Kadiddlehopper
Senior Member
A while back someone shared this with me ,so I thought I would pass it along .
______________________Luminosity Layer____________________________
Firstly you must have a merged or one only layer to apply this to, as it has to work on that one layer, when you apply it is personal taste IMHO.
- You have your layer, now duplicate it.
- Click on the duplicated layer to activate it and then go to Channels. Here you will have an RGB layer, then three others, R, G, and B.
- Now with you finger pressed on the CMD button, Ctrl key on a PC,, click on the RGB channel, 'marching ants' should then appear on the image. Return to the Layers Palette.
- Click on the add mask icon in the bottom bar of the Layer palette. A B/W version will now appear next to the colour duplicated layer.
- Ensure the B/W icon is active, there should be white corner right angles visible, indicating this is ACTIVE.
Now here is the fun part, go to the Blend mode button in the Layer palette and scroll down to Multiply or Overlay, each blend will have it's own cause & effect, you choose! Then using the Opacity slider you can vary the amount required. You may now wish to add an adjustment mask and paint only the areas you wish this to be applied too.
__________________________________________________ _____________________
I made two actions from this ,and mostly use the Multiply layer . I use it when I have a slightly over exposed frame ,Like when there is a sky or some water in the background that is light blue /almost white ,and I want it to be a more saturated blue . It also helps bring out some of the subtle colors in the birds .
(Before) photo after adjustments in ACR
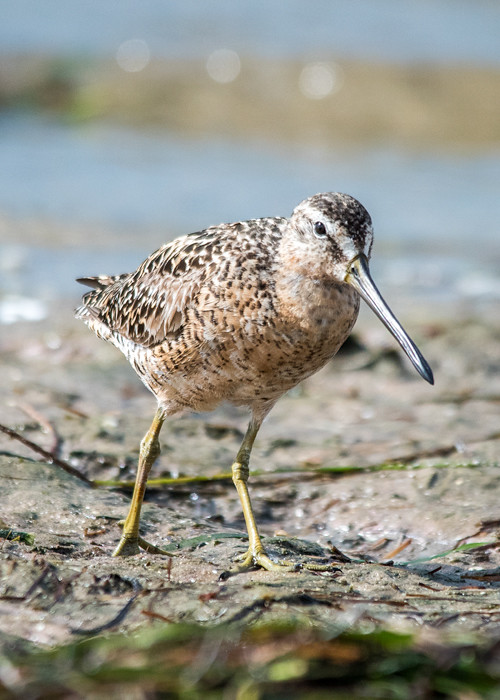 DSC_0443before by Clyde Hopper, on Flickr
(After ) Luminosity Multiply Layer
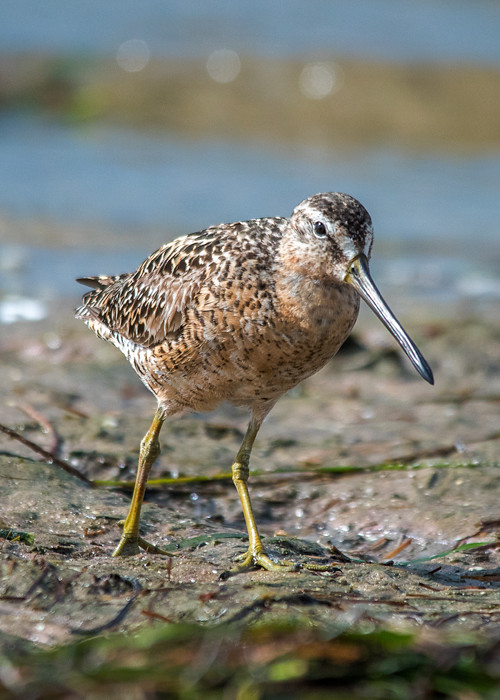 DSC_0443 by Clyde Hopper, on Flickr
__________________
______________________Luminosity Layer____________________________
Firstly you must have a merged or one only layer to apply this to, as it has to work on that one layer, when you apply it is personal taste IMHO.
- You have your layer, now duplicate it.
- Click on the duplicated layer to activate it and then go to Channels. Here you will have an RGB layer, then three others, R, G, and B.
- Now with you finger pressed on the CMD button, Ctrl key on a PC,, click on the RGB channel, 'marching ants' should then appear on the image. Return to the Layers Palette.
- Click on the add mask icon in the bottom bar of the Layer palette. A B/W version will now appear next to the colour duplicated layer.
- Ensure the B/W icon is active, there should be white corner right angles visible, indicating this is ACTIVE.
Now here is the fun part, go to the Blend mode button in the Layer palette and scroll down to Multiply or Overlay, each blend will have it's own cause & effect, you choose! Then using the Opacity slider you can vary the amount required. You may now wish to add an adjustment mask and paint only the areas you wish this to be applied too.
__________________________________________________ _____________________
I made two actions from this ,and mostly use the Multiply layer . I use it when I have a slightly over exposed frame ,Like when there is a sky or some water in the background that is light blue /almost white ,and I want it to be a more saturated blue . It also helps bring out some of the subtle colors in the birds .
(Before) photo after adjustments in ACR
DSC_0443before by Clyde Hopper, on Flickr(After ) Luminosity Multiply Layer
DSC_0443 by Clyde Hopper, on Flickr__________________

