A First-timer's Bow Setup and Tuning Thread

Brewskis

Senior Member
Back at it. Pick my poison, huh? OK, well I figured the easiest option would be to take the quarter turn out of the top limb bolt. So it I did that. That was easy thanks to the marks I made on the limb bolts during my first step of this process (post 14).

IMG_7778.JPG


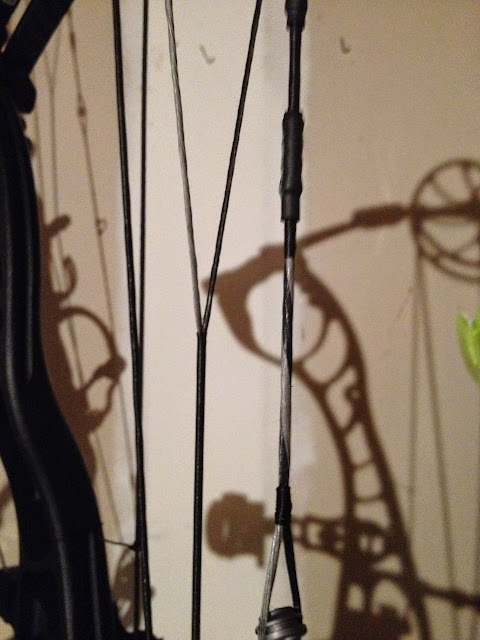
Shot some bare shafts...

IMG_7777.JPG


Nice. :fine:

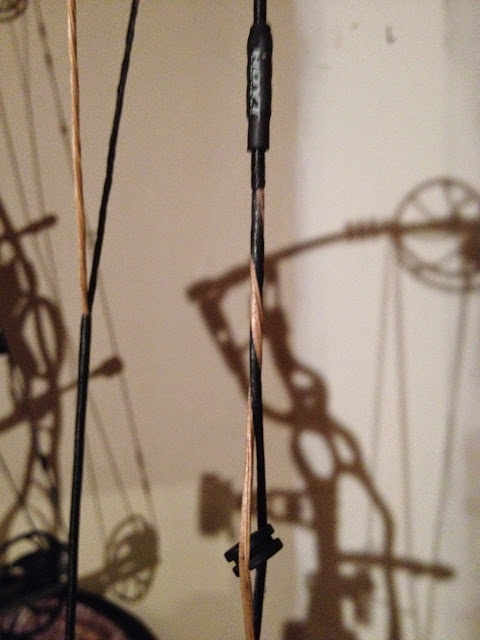
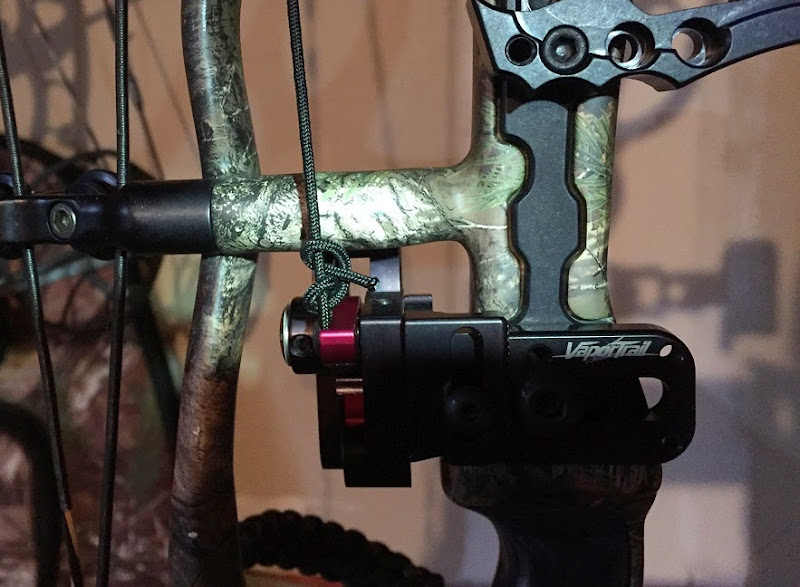
However, not being one to leave well enough alone, I decided to reverse that change, and try the other poison. I figure this whole process is as much a means to an end (that end being a well-tuned bow) as it is a learning experience. So I put that quarter turn back into the top limb bolt, and slightly raised the rest (and made sure to sufficiently tighten the elevation screw this time..)

Again shot some bare shafts...

IMG_7780.JPG


Sweet. :banana:

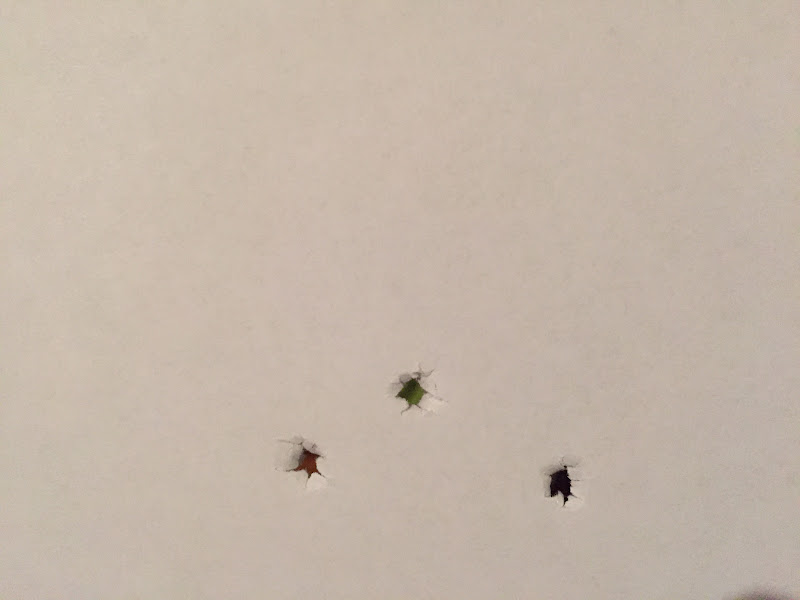
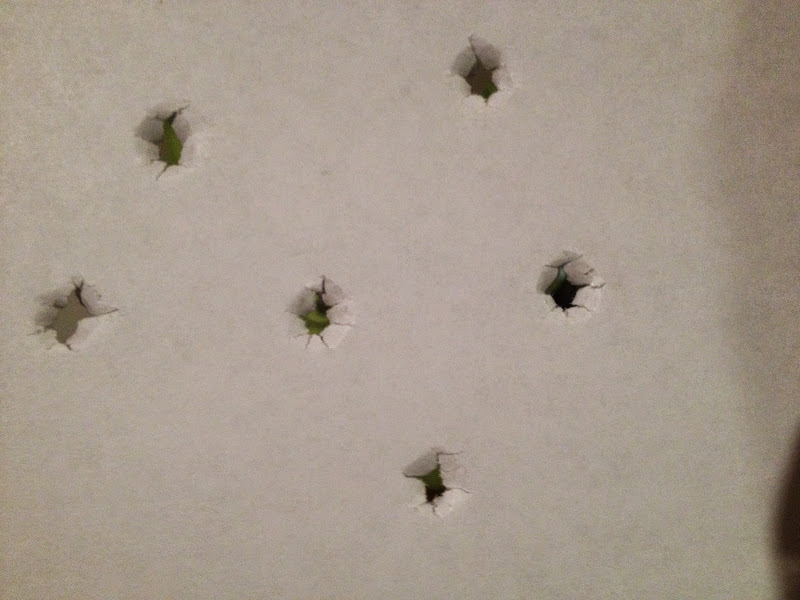
As you can see I shot three at 5 feet and another three at 10 feet, and got several bullet holes (I'm sure that my form/grip varies slightly from shot to shot, so I'm OK with the slight imperfections in those holes).

I'm guessing this is good enough to proceed?
 

Brewskis

Senior Member
Imagine my frustration the next day when I shot the bow again, and was getting strange tears again (don't even remember which direction at this point). Anyways, here's a really long post about it.

After a couple days of strange paper tears, making changes to address them and increasing frustation, I decided to start over, and put everything back pretty much the way it was from the box.. :crazy:

Checked all my specs (DW, DL, cam sync, axle-to-axle, brace height, tiller). Everything was in spec except DL was a smidge long and the top cam was ahead by a bit more than 1/8". I put the full twist into the control cable again, and that brought the bottom cam ever so slightly ahead again. I then put one half twist into each yoke of the buss cable. This advanced the top just enough so that it was ahead by the thickness of a credit card. Perfect.

I double checked all my specs again, and everything was on now including DL. My top cam pre-lean was set so that an arrow placed on the left side of the cam intersected the string right around the D-loop. I set my arrow running through the center of the Berger hole (I believe I set it to level/90 degrees to the string), and center shot around 3/4".

At this point, I decided to install my sight and peep sight before shooting since I figured it would help me ensure I was always aiming at the same spot, and could help me confirm I was anchoring the same (in order to have my peep and sight align). I wondered if my anchor could have been unknowingly raising and lowering between shots causing different tears. I placed the peep sight in the string, and temporarily tied around it with nock thread so it would come flying out until I was sure of where I wanted it.

Stepped back to 5', and fired a shot. Bullet-hole. Stepped back farther. What looked like a bullet-hole at distance had a very slight right-tear.

Everything on the bow was in spec. My arrows were the correct spine. I was aligning my peep with my sight, and making sure to consistently anchor the same. Therefore, I figured it had to be my grip.

Having read the following, right tear - add pressure on the thumb side / left tear - add pressure to the outer edge, I stepped back again, and added very slight pressure to the thumb. That slight right tear became a bullet-hole. I then stepped back farther. Bullet-hole.

Final analysis: It's been repeatedly said here that good and consistent form is essential when shooting bare shafts. There seems to be so many factors that can result in a bare shaft tearing paper including grip and anchor. How else could I be shooting bullet-holes one day and not the next after changing nothing to the tune?

After over-analyzing just about everything along the way :huh:, I guess my questions are: Is it correct to say that a bow can be tuned according to the manufacturer's specs, but ultimately it must then be tuned to a specific individual and his way of shooting (within reason)? If so, at what point do you attribute imperfect arrow flight to the shooter and not the bow so as to not start 'chasing your tail' changing the bow?
 

Kris87

Senior Member
After over-analyzing just about everything along the way :huh:, I guess my questions are: Is it correct to say that a bow can be tuned according to the manufacturer's specs, but ultimately it must then be tuned to a specific individual and his way of shooting (within reason)? If so, at what point do you attribute imperfect arrow flight to the shooter and not the bow so as to not start 'chasing your tail' changing the bow?

Yes and no. You're understanding it the same way I believe to be the correct way(which is only my thinking). I believe you set it up to have the best power stroke possible, accounting for all the variables. But then as you stated, you have the shooter involved. You have high grips, low grips, face pressure, different releases, etc....all that stuff makes a difference. So then I say you make small changes to try to account for those variables at the end. I don't make wholesale changes to account for somebody's bad grip. I then try to have them work on that variable rather than moving the bow's specs all over the place. Its not a science for sure....more of an art. :)
 

Brewskis

Senior Member
Makes sense. I gotta say, I was pretty close to calling you the other evening, admitting defeat, and finding out when you could sort things out.

However, during my frustations, I was reading a lot here, and came across several posts (namely, this one from when you were tuning JT's bow, and this one from your write up on the Elite E32) that reminded me how the bow can be in tune, and the shooter could be the reason for the results (especially with bare shafts!). As they say, at a certain point 'it's not the arrow, it's the indian'.

I haven't really shot a lot in the past couple of months, and I'm wondering if that has contributed to my form breaking down (at least to a point where it's not consistent and repeatable). Having come to these realizations, and not feeling confident in the adjustments I had been making to the bow while I was 'chasing my tail' trying to fix tears, I reversed all those changes, and got the bow back to recommended specs.

Working on my form the past couple of days has yielded consistent bullet-holes through paper at various distances, and understanding why has contributed to a lot more confidence.

However, that leads to my next question. I remember watching one of GRIV's 'Thing A Week' videos on paper tuning recently where he said finally getting a bullet hole through paper, doesn't mean the bow is perfectly tuned, but that it means you're ready to start tuning the bow. The arrow is flying straight from the bow, but not necessarily grouping the best it can.

I've read about creep tuning, torque tuning, french tuning, modified french tuning, walk-back tuning, broadhead tuning, fletched with bareshaft tuning, etc.

What form of tuning you recommend moving onto now?
 

Brewskis

Senior Member
Regarding tying in my peep, I have a few questions.

  • Is there any advantage to tying the peep in with two separate knots (one above and one below) instead of tying one knot above and then weaving it down the string around the peep and then tying the second knot with one continuous piece of thread?

  • I recall you showing me how to tie the knots, but I can't recall how it's done. Is that the pull-through method Pasinthrough showed in this thread ? Or is it the standard closed end archery loop you mentioned, and would it be hard to explain how to tie it?

  • I noticed that the string is very tightly twisted right above where I had to separate the string, and insert the peep. Is this OK, or should a twist be taken out of the string before inserting and tying in the peep?

    Left - Faktor 34 - Right - CS34:

    IMG_7801.JPG
    IMG_7802.JPG


Kris87

Senior Member
As far as the next tuning step, I typically don't do much more other than shoot a fletched and bareshaft at some type of distance. 20 yards is a long ways for most guys to shoot one, as I have mentioned many times. You can work your way back if you want. Of all the methods you mentioned, walk back tuning is the only method I really have ever done, but rarely see the need if my bow is tuned ok and I pay attention to my sight bubble. If your bow is shooting a bareshaft well, and you have sufficient fletching, its going to shoot broadheads like darts.

As far as the peep...everyone has their own preferred methods. Some I tie with one piece and weave it through, but generally I just tie two separate knots, one above and one below. I rarely even tie anything around the peep any longer. You just don't want to pinch the string down too much around the peep, as it can cause rotation issues. I don't know the names of the loops I use. I use the same method using one piece and serve back over itself while unwrapping. I don't use two pieces and wrap over a loop and pull it back through. Just an extra step that I don't have to use.
 

pasinthrough

Senior Member
I like the two knots better than the one. If you need to move your peep a little, you don't need to untie it all the way to do it. Peeps usually stay where you put them.

Congrats on doing all this yourself. It's the only way you'll learn.
 

Brewskis

Senior Member
That's a good reason for the two knots, Pasinthrough. And thanks. Glad to be learning how to do all of this, and couldn't be learning it without y'all's help.

Kris, I read today about back serving and it looked a lot like what you showed me and described earlier. Looks like it's another way of accomplishing the same knot in Pasinthrough's video without the braided loop.

I'm anxious to see how my bare shafts fly with fletched at distance, but I'm gonna have to wait for this weather to improve first.
 

Brewskis

Senior Member
I pay attention to my sight bubble.

Speaking of the sight bubble, which obviously helps with accuracy and consistency, I learned something that perhaps many of y'all already know, but if you didn't here it is.

I noticed the need to confirm the sight bubble level is actually showing true level when the sight arm and bow are plumb (assuming you like to hold the bow plumb when shooting). I believe this is referred to as 2nd axis leveling. Anyways, the Black Gold sights have two screws holding the level in place, and allow for adjustment. I had removed the level temporarily to swap out the sight ring, but I guess it'd be good to confirm this even from the manufacturer or previous owner if bought used.

Fortunately, this is easy to do using a small torpedo level held plumb forwards and backwards and side to side against the sight arm while adjusting the sight level to match.

IMG_7811%255B1%255D.JPG
 

Kris87

Senior Member
That's the correct way to do it. I normally check my level with a level on the sight mounting bracket as well as one off the limb pockets to have two points of reference. You won't notice much left/right misses at close distance, but it starts to grow exponentially at distance.
 

Kris87

Senior Member
Most right handed shooters cant the bow to the right, or in a clockwise rotation.
 

Brewskis

Senior Member
OK, thanks for confirming, Kris.

Weather's supposed to nicer soon, so I'm looking forward to getting out and checking my arrow flight, namely bareshafts with fletched, at distance. In the meantime, since arrows have such a huge impact on how/if a bow tunes, I thought I'd post what I went with arrow-wise for this hunting setup.

I decided to go long and heavy. The decision to go long was based on the broadhead I hunt with - Ramcats. They have flown and performed perfectly during my short time using them. However, I was having contact issues between my broadheads and the riser/shelf last season if I forgot to precisely index the blades a certain way (see this thread for more info). Therefore, I decided to eliminate that issue, and get a longer arrow. Doing so gave me the added benefit of a heavier arrow. I ended up with the following:

Easton Bloodline 330
30.25" carbon-to-carbon
2" Blazer vanes w/ 1 degree right-hand offset
Easton HP insert
Nockturnal H nock

I plugged my current bow setups (Faktor 34 and CS 34 - 29.5" DL - 55 lb. DW) into the OnTarget2 software, and found I can shoot this arrow with either a 100 grain or 125 grain head without a significant impact on spine (0.012).

With a 100 grain head I have a F.O.C. of 10.00% and K.E. of 62.04. Finished arrow weight - 430
With a 125 grain head I have a F.O.C. of 12.23% and K.E. of 61.25. Finished arrow weight - 455

I don't have a chronograph, so I'm not sure on what kind of speeds I'll be getting with this arrow and my setups. I also don't know how accurate those internet calculators are, but I tried a couple out and they were saying between 265 to 275 FPS depending on if I go with a 100 grain or 125 grain head.
 

Brewskis

Senior Member
BTW, I highly recommend Jerry at South Shore Archery for arrows. He tests every shaft, and finds the stiff side. He then marks them accordingly so that they can be repeatedly fletched the same way. This helps a lot with nock tuning. He also cuts, squares, and preps the shafts. In the case of the Bloodlines, which have factory cresting, he removes the factory cresting which I hear from several people can make it hard to re-fletch. He also gives the option of different wraps and lengths if you don't want to do this yourself.

I've ordered two sets of arrows from him during the past year, and all of the above was included by him for just a negligible amount more than I would have paid for plain-jane, off-the-shelf arrows from somewhere else.
 

Brewskis

Senior Member
Alright, finally able to do some shooting last evening.

But before getting to that, I'll add that as previously mentioned a few weeks ago I had been getting a slight right tear. I was able to get rid of it by applying a bit more thumb-side pressure to the grip. However, I found that this was something I just couldn't get used to doing over and over again. I felt like I had a pretty good grip, so I decided to make a small change to the bow. I took a half twist out of the left yoke and put a half twist into the right. After doing this, I found that I could now grip the bow as I normally would, and no longer get that right tear. I forgot to check the bow specs and cam pre-lean afterwards, but did confirm the cam timing was still perfect. I felt that was a fairly insignificant change that wouldn't affect the tune.

Fast-forward back to last night when I was finally able to confirm everything at longer distance. I started out shooting through paper just to make sure everything was still good. Got some fairly good holes at 5, 8, 12 feet.

IMG_0168.JPG


I then shot a bareshaft with a fletched at 5 yards.

IMG_0172.JPG


Based on what I'd seen so far, I decided to head outside, and start shooting bareshafts and fletched arrows at 20 yards.

IMG_0139.JPG


IMG_0142.JPG


Honestly, I was kinda surprised. I guess I was expecting to see at least more variation in nock direction between the bareshafts and fletched (there was an ever so slight nock left with the bareshafts).

Not one to trust one sample, I decided to try it again.

IMG_0143.JPG


IMG_0144.JPG


Finally, what I had been waiting for happened. A bareshaft that didn't fly true. I removed that arrow, and shot it again after making a slight change to my form.

IMG_0146.JPG


The result was better, but obviously still showing signs of something slightly off. So I made another slight change, and re-shot that same arrow.

IMG_0150.JPG


Bingo! This was a good reminder for me of how there's little tolerance for bad form when you're shooting bareshafts downrange. A bareshaft will not lie to you. If you have a problem/inconsistency in your form, it is going to show.

As I mentioned before, I have not been shooting much since the season ended a couple months ago. Obviously, I was/am a little rusty in my form. I suppose this emphasizes the need for regular practice in order to ingrain a repeatable pre-shot routine.
 

Brewskis

Senior Member
Afraid of having my feelings hurt by shooting a bareshaft any farther than 20 yards, I decided to shoot the fletched arrows at 25 yards and then 30 yards just to see what was happening. Here's a few pairs I shot a those distances.

25 yards:
IMG_0163.JPG


30 yards:
IMG_0154.JPG


IMG_0155.JPG


As you can see I had a couple pairs at 30 yards that impacted right with each other, but with one arrow nock-left. Although I'm not always getting nock left, my 'misses' are consistently nock left (fletched and bareshaft). Not sure if this is attributable to form, or if there's a change I should make to my tune?

I'm also interested to find out how flight would have been affected with a broadhead on the front instead of a field point. I suppose that will be upcoming. I would have tried it last night, but I was shooting 125 grain FPs and have not bought any 125 grain Ramcats yet (actually haven't been able to find them at a local store, so I'll probably have to order some online). I'll post up results of that when I'm able to test it.

In the meantime, if there's any feedback/tips from the resident experts here on the results shown above, I'd be glad to hear it. Whereas overall I'm pleased with the results so far, I'm a first-timer at this, and hesitant to call the tune good.
 

Kris87

Senior Member
With flight that good, you could probably screw two Ramcats on the front and it would fly well. :D

Seriously, you don't want to touch anything. Those results are as good as anyone can expect. That setup will shoot a fixed blade head like darts. Don't worry.
 

Brewskis

Senior Member
10-4 :cool:

I've got some 125 grain BHs on the way now. At this point, I'm going to proceed with serving my peep sight into the string, and wrapping up a few finishing touches.
 

Brewskis

Senior Member
Alright, got my peep sight served into the string.

IMG_0175.JPG


I started tying my knots about 1" above and below the peep as mentioned by Pasinthrough in his video. As mentioned by Kris, this is to help eliminate rotation issues due to pinching the string down too close around the peep.

I should also mention that a while back when I initially placed my peep in the string and then found the desired height, it was rotated to the right. I put one full twist into the string at the top cam, and this rotated the peep around to perfect alignment.

I also made sure that my sight housing ring was set where I wanted it before serving in the peep. This meant getting my 20 yard sight pin where I wanted it in the housing, and then sighting in that pin.
 

Brewskis

Senior Member
A few other finishing touches I referred to earlier:

First, I trimmed my rest cord, but also made sure to leave a bit of excess in the event I ever need it. I took the excess, and just tied it off to the cord using a loose D-loop-style knot.

IMG_0182a.jpg


I then used a tip from this thread to ensure my rest cord wasn't flopping all over during the shot. I've found this especially important with my TightSpot quiver mount which sits very close to the riser and the rest cord. I don't even like to think of what might happen if that rest cord caught the mount or quiver in someway. Speaking of the quiver mount, I went ahead and threw that on.

IMG_0190.JPG


I also used this AirShox/moleskin tip shown here to silent the initial squeak that happens when pulling back a Hoyt with AirShox for the first time.

IMG_0187.JPG


Then I adjusted the string stop so that it was centered in front of the string, and just slightly touching it.

IMG_0194.JPG


Finally, I re-tied my D-loop using a little bit of wax on the string to help lock down the knots, and prevent it from loosening/spinning on the string. I think next time I'm going to measure the length of the D-loop material needed for my specific D-loop, and cut a few of these lengths. That way if I have a D-loop break in the field or I simply want to replace the current one, I'll know that it will be the exact same length as before, and therefore not affect my anchor point.
 
Top