Welcome Guest!
You are using an out of date browser. It may not display this or other websites correctly.
You should upgrade or use an alternative browser.
You should upgrade or use an alternative browser.
Fly Recipes
- Thread starter KINGFISHER
- Start date

gabreamfanatic
Senior Member
well this is not mine but i asked the guy to do a step by step aid. this is called the briminator and is deadly on gills and bass. so enjo it.
http://www.warmfly.com/index.php?option=com_smf&Itemid=26&topic=3084.0
http://www.warmfly.com/index.php?option=com_smf&Itemid=26&topic=3084.0


KINGFISHER
Senior Member
Nice Black Gnat Paymaster! I picked up a black Keough dry fly cape for $19 (a steal I know) and I think I'm gonna be putting it to use very soon after looking at that fly!
Nice Black Gnat Paymaster! I picked up a black Keough dry fly cape for $19 (a steal I know) and I think I'm gonna be putting it to use very soon after looking at that fly!
Yup,mine is about used up. I also know I gave more than that for it too!

injun joe
Gone But Not Forgotten
Dang nice wildebeest hair!
Dang nice wildebeest hair!
Told you I'd find a use for that hide!

overbrook
Senior Member
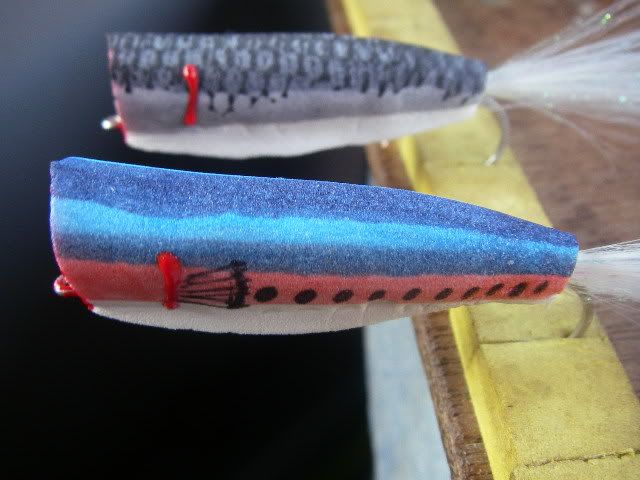
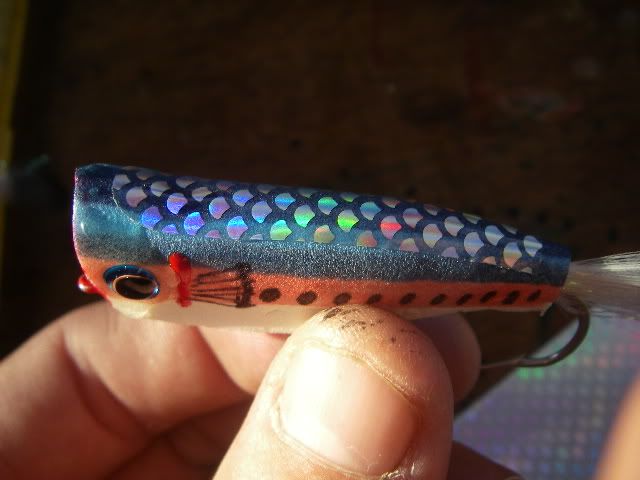
Overbrook's soft foam baitfish poppers
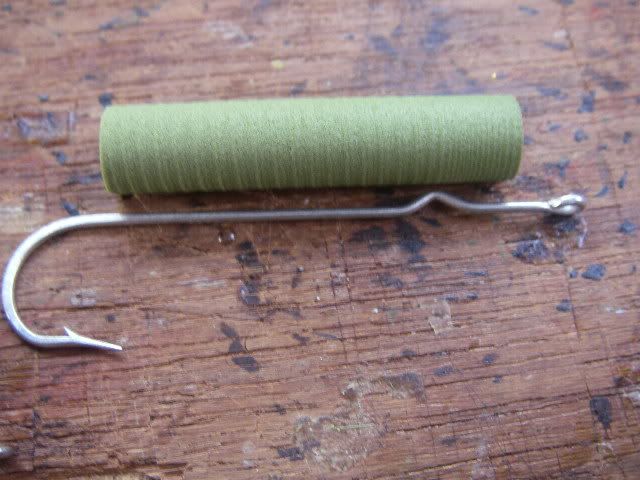
The first two things you are going to need are size 2/0 popper hooks (I do them in several sizes) and 5/16th inch foam cylanders (match the cylander size to the hook)
3D prismatic stick on eyes (these are the new jurassic 3D eyes...another great EBAY find) and some DNA Holofusion (white can be colored)

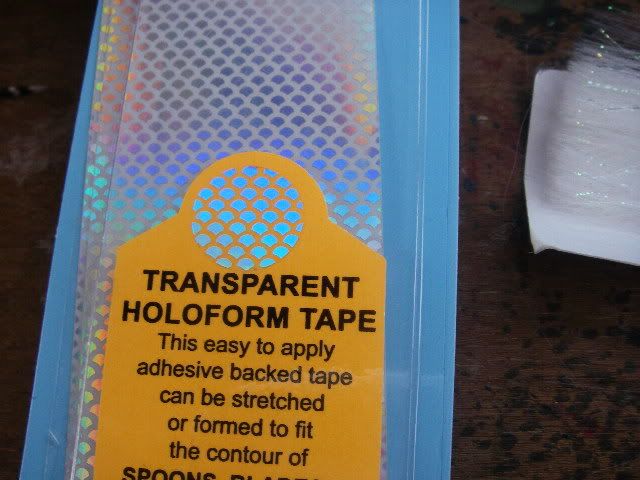
clear fish scale tape....
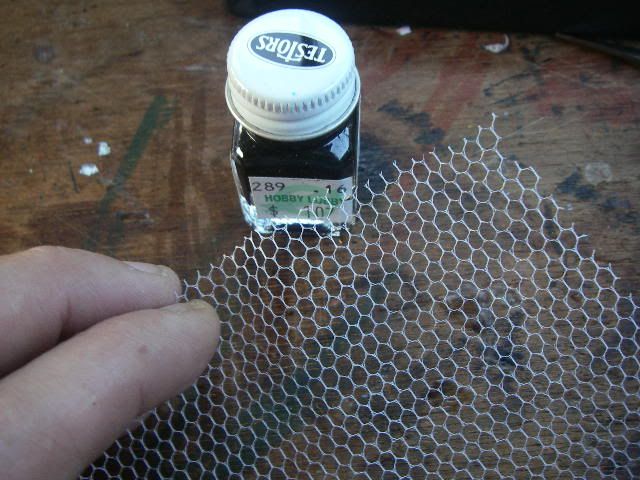
some black Testors model paint and curtain sheer (can be found in the craft/sewing section at Wal-mart)
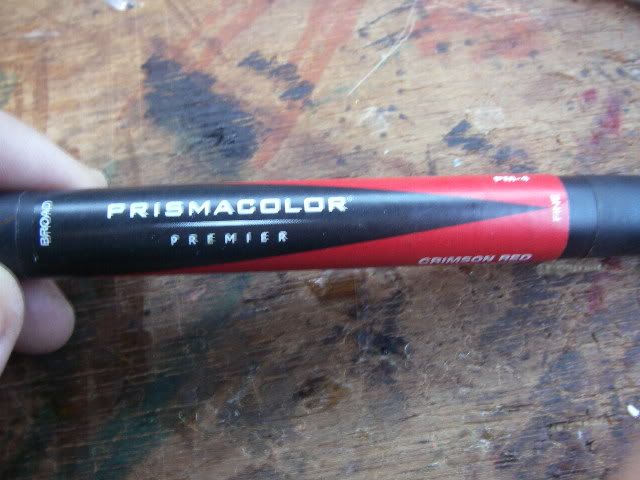
various colors of prismacolor markers
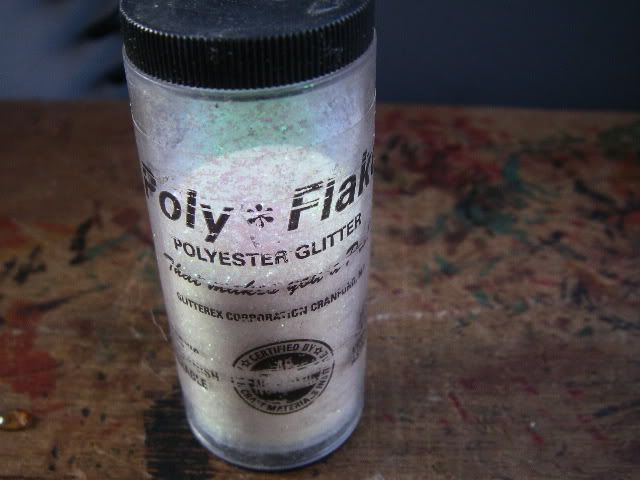
Poly flake super fine glitter...
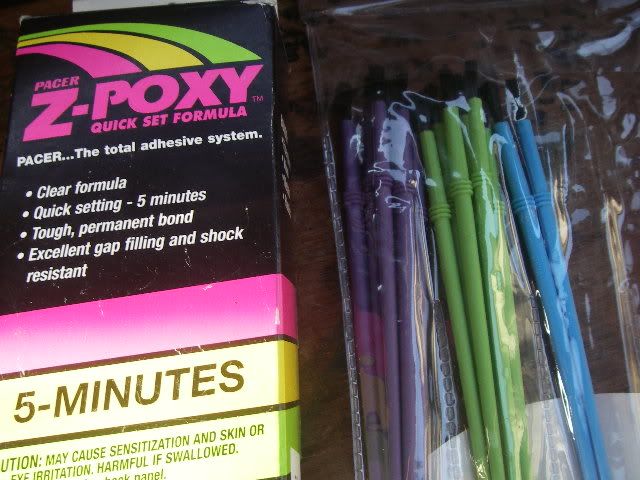
Z-poxy five minute and 30 minute epoxy and disposable brushes (pack of 30 is about a $1 at Wal-mart)
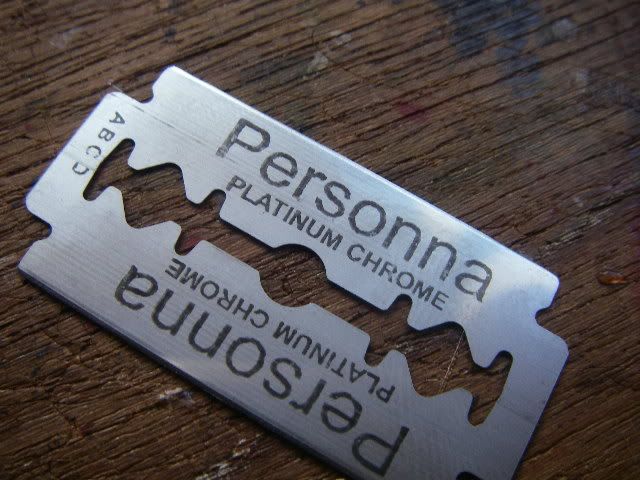
double edge razors , red t-shirt paint and normal tying tools....scissors, thread and bobbin,bodkin etc.
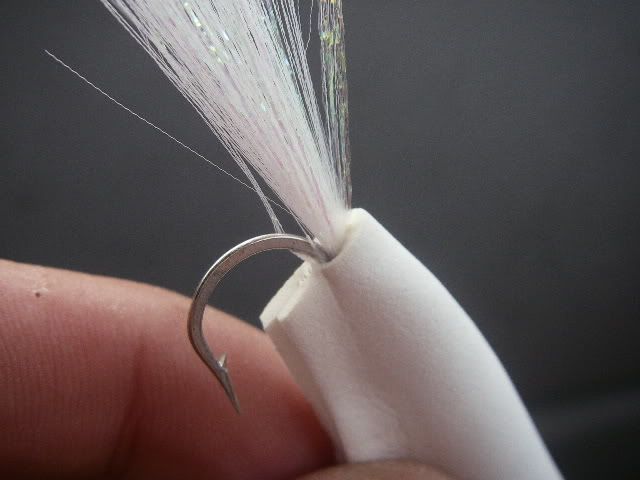
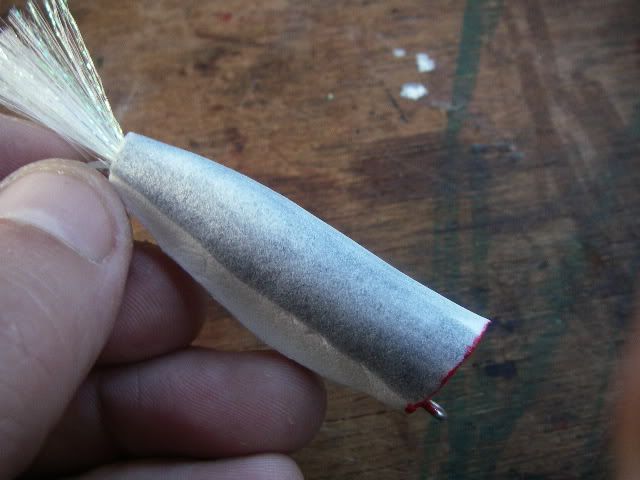
start by coating hook shank with thread from just in front of hump to the rear where you will be tying in the tail....
tie in a generous portion of the DNA Holofusion for the tail (on this size I trim the tail at about an inch long).....
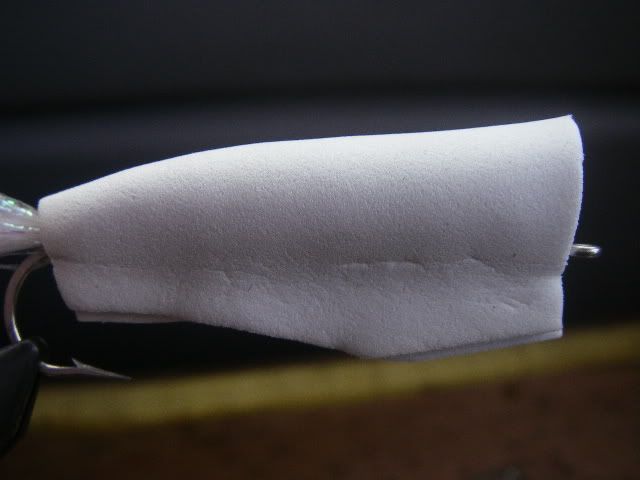
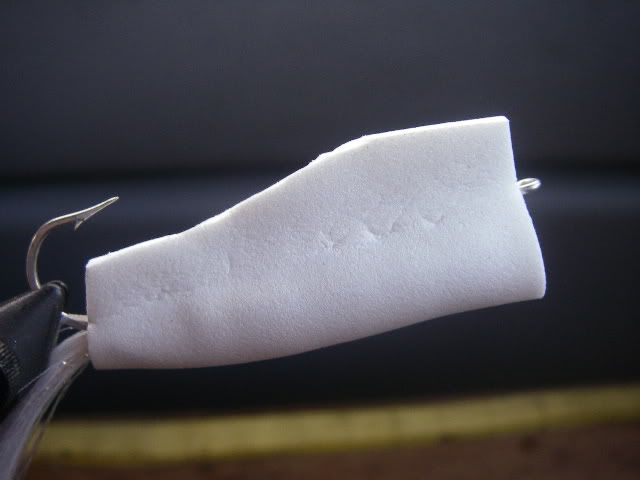
then using the thread secure the foam cylander down tapering it to the rear.....
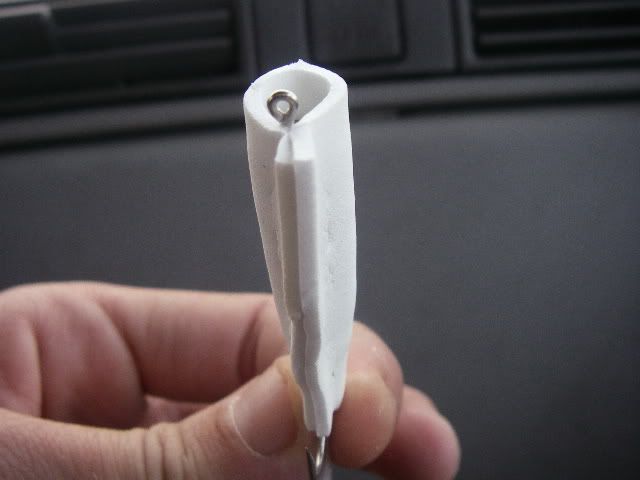
notice the distance left behind the eye of the hook...this is so you can form the cupped face......
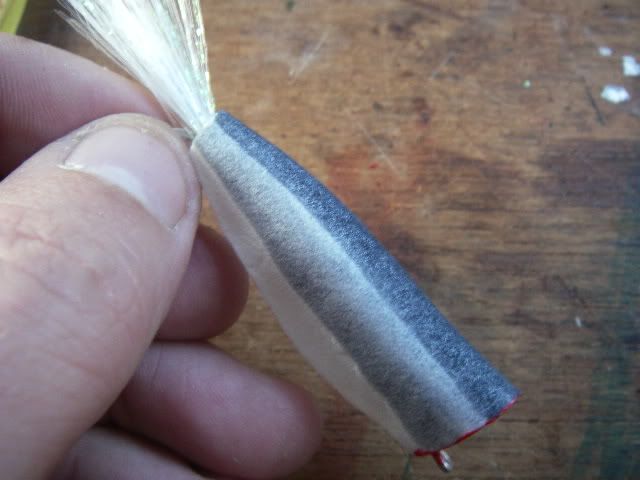
now measure from the rear of the cylander foam body to the eye of the hook....here we have 1 3/4 inches.....
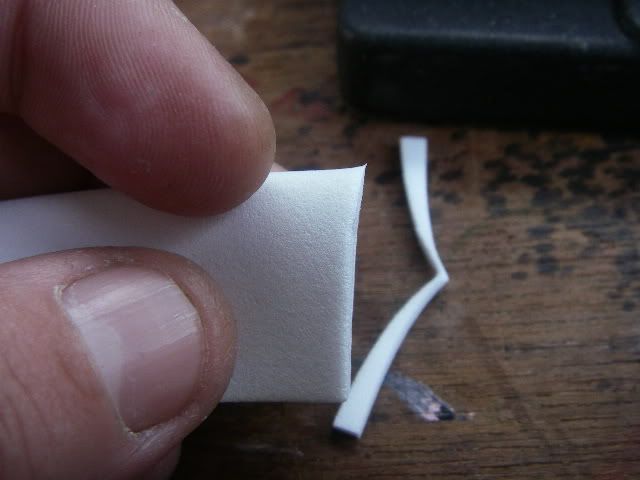
cut pieces of white 2mm foam the 1 3/4 inches square and fold them in half......
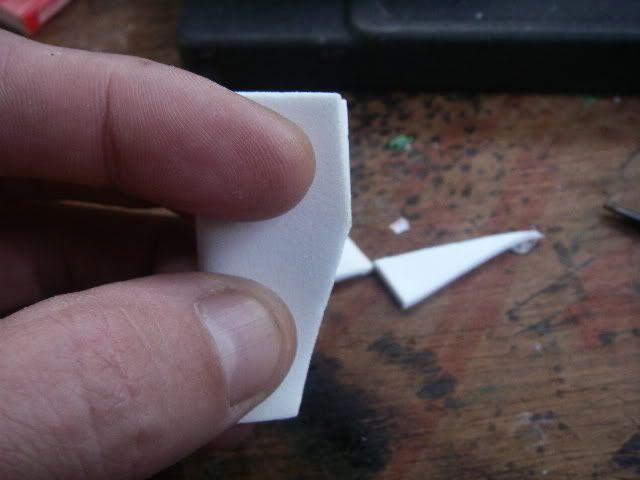
now where the face is....trim at a slight angle so that when wrapped over the cylander it will give an even face.....
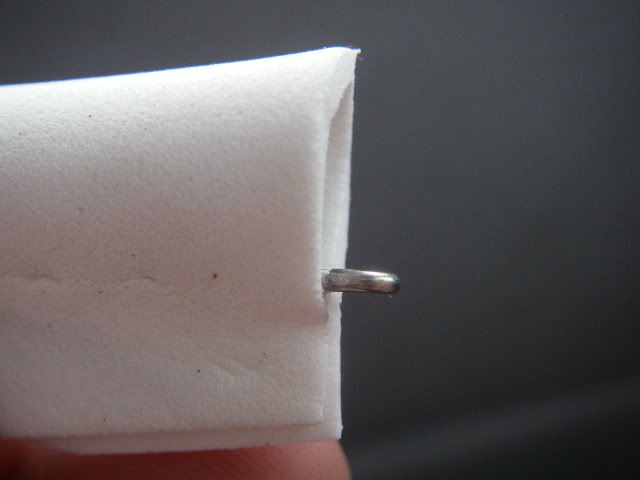
then along the bottom rear cut a taper from the rear forward to the belly so that when folded over the cylander it will not cover the point of the hook.....
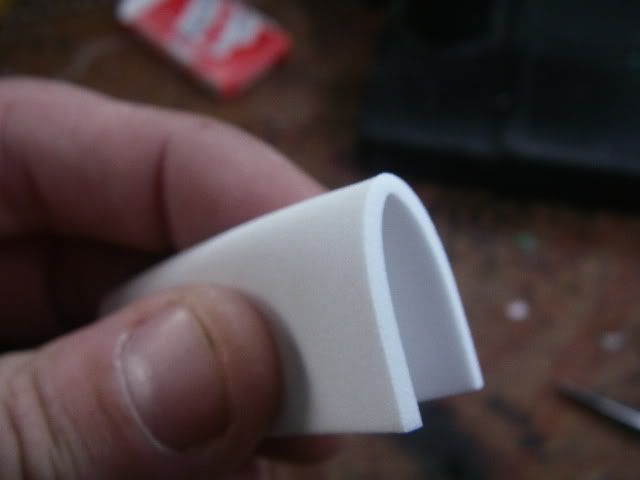
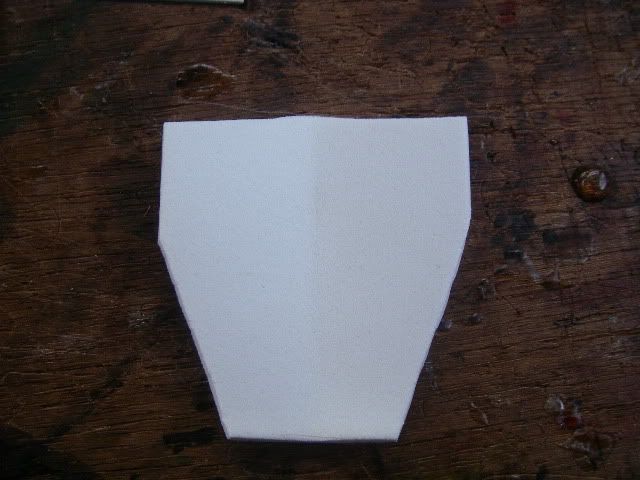
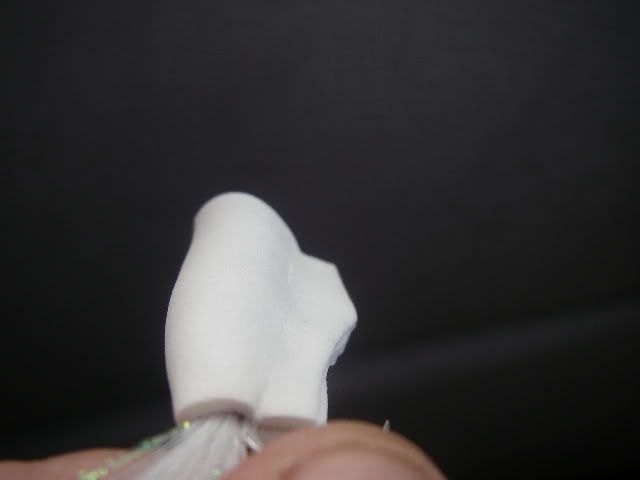
you should end up with a shape like this.....
now coat the cylander and thread with super glue and give the 2mm foam a light coat of super glue and fold the 2mm foam over the cylander so the the face is just behind the eye of the hook......
after securing it correctly at the eye...go to the rear and pich it tight down around the cylander and the hook shank closing any gap.....
make sure it is tight in the front as well......
just behind the eye of the hook.....
also make sure the foam is secured straight up and down so the the body is not "lop sided" with the shank of the hook.....
the whole body needs to be piched firmly tight to the hook shank....I use needle nose pliers to squeeze it tight while the super glue has time to adhere both sides together....
as you can see from the slight indentions.....another handy tool would be those heavy metal paper clips with the flat flanges.....then you could clip it along the bottom tight to the hook shank and let it set till the glue has had time to adhere.....
The first two things you are going to need are size 2/0 popper hooks (I do them in several sizes) and 5/16th inch foam cylanders (match the cylander size to the hook)
3D prismatic stick on eyes (these are the new jurassic 3D eyes...another great EBAY find) and some DNA Holofusion (white can be colored)
clear fish scale tape....
some black Testors model paint and curtain sheer (can be found in the craft/sewing section at Wal-mart)
various colors of prismacolor markers
Poly flake super fine glitter...
Z-poxy five minute and 30 minute epoxy and disposable brushes (pack of 30 is about a $1 at Wal-mart)
double edge razors , red t-shirt paint and normal tying tools....scissors, thread and bobbin,bodkin etc.
start by coating hook shank with thread from just in front of hump to the rear where you will be tying in the tail....
tie in a generous portion of the DNA Holofusion for the tail (on this size I trim the tail at about an inch long).....
then using the thread secure the foam cylander down tapering it to the rear.....
notice the distance left behind the eye of the hook...this is so you can form the cupped face......
now measure from the rear of the cylander foam body to the eye of the hook....here we have 1 3/4 inches.....
cut pieces of white 2mm foam the 1 3/4 inches square and fold them in half......
now where the face is....trim at a slight angle so that when wrapped over the cylander it will give an even face.....
then along the bottom rear cut a taper from the rear forward to the belly so that when folded over the cylander it will not cover the point of the hook.....
you should end up with a shape like this.....
now coat the cylander and thread with super glue and give the 2mm foam a light coat of super glue and fold the 2mm foam over the cylander so the the face is just behind the eye of the hook......
after securing it correctly at the eye...go to the rear and pich it tight down around the cylander and the hook shank closing any gap.....
make sure it is tight in the front as well......
just behind the eye of the hook.....
also make sure the foam is secured straight up and down so the the body is not "lop sided" with the shank of the hook.....
the whole body needs to be piched firmly tight to the hook shank....I use needle nose pliers to squeeze it tight while the super glue has time to adhere both sides together....
as you can see from the slight indentions.....another handy tool would be those heavy metal paper clips with the flat flanges.....then you could clip it along the bottom tight to the hook shank and let it set till the glue has had time to adhere.....
overbrook
Senior Member
Soft foam baitfish poppers part II
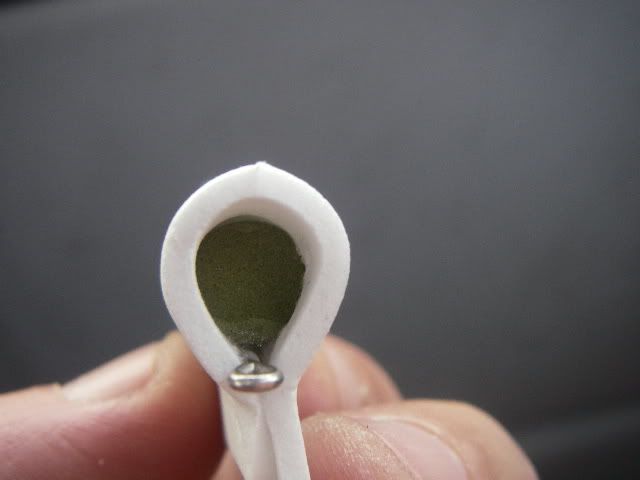
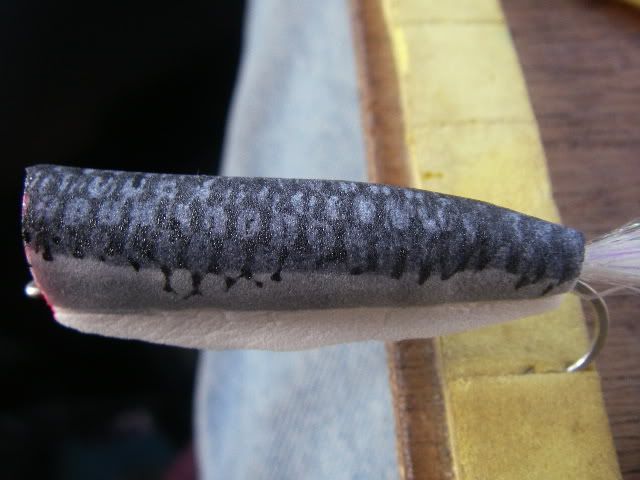
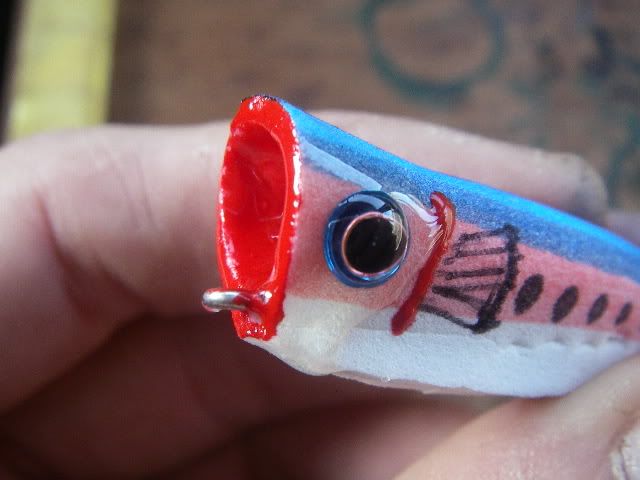
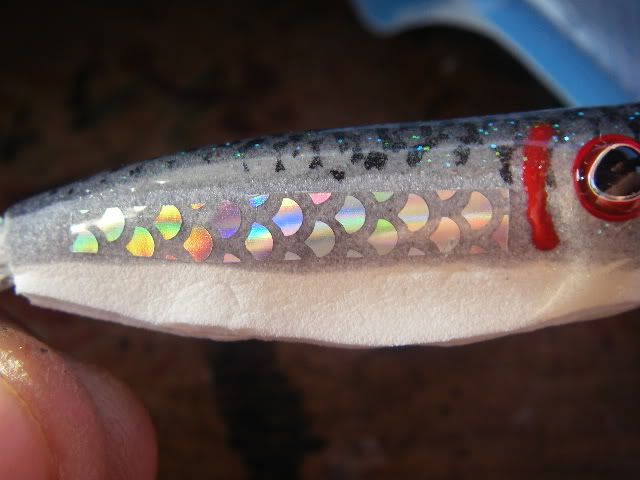
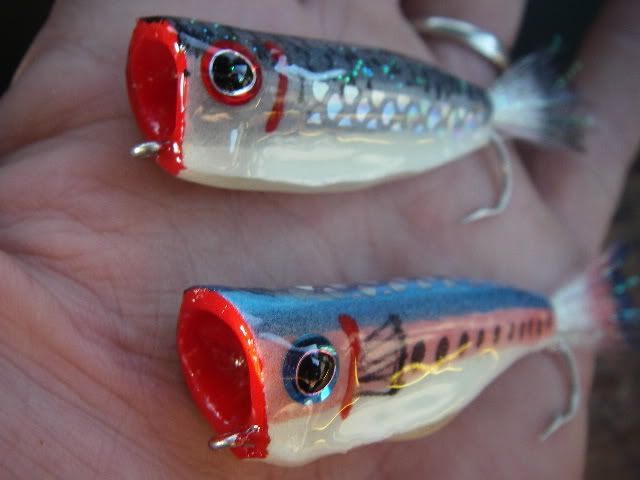
once dried you then use a sharp razor blade to trim the bottom of the body leaving a bit of a belly from the front just behind the eye towards the rear...trim the rear close (maybe 1/16th of an inch) to the hook shank......

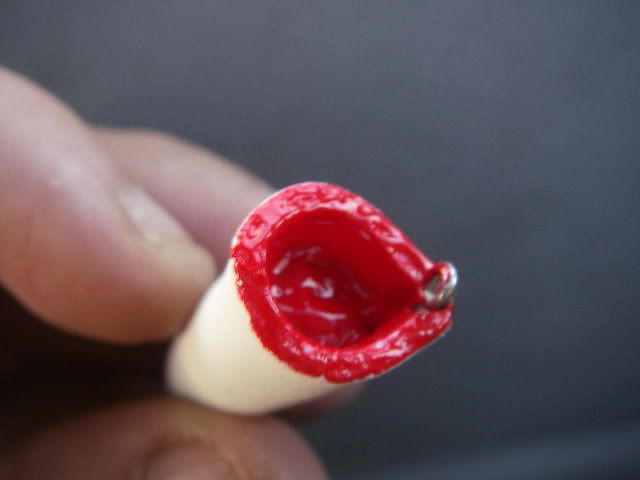
the next step is to color the mouth with the red t-shirt paint....just dab it all around inside and along the outter edge...
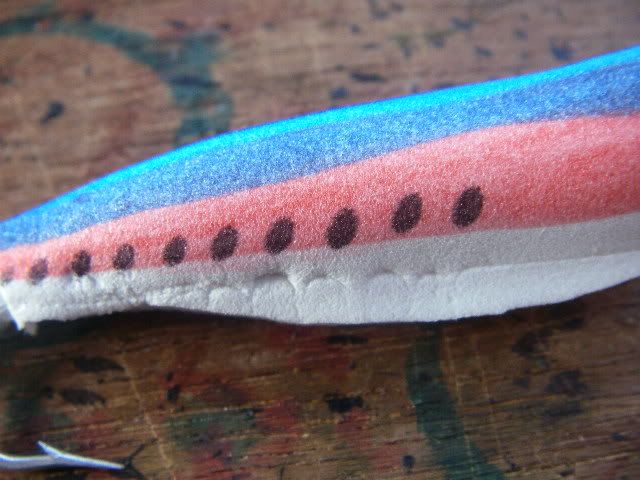
once the t-shirt paint has had time to dry....its time to color and decorate the poppers....this is the fun part!.....using the prismacolor markers....color the sides (always work from light to dark....and in this case it means bottom to top)....
then add the back color or top color.....
there are several ways of decorating them....one is to put fish sclae patterns on the back using the curtain sheer....cut a small swatch of the sheer just a little bigger than the popper.....then on a piece of cardboard or something paint a big splotch of paint about the size of the popper....lay the swatch over the paint and brush over it....coating the swatch with paint....when you pick it up blow out any holes filled with paint....then strching it out to the side with both hands ...carefully lay it over the back of the popper and pull it snuggly down about 45 degrees on both sides.....give it a few seconds then lift straight up and you should have a good scale print.....and would'nt ya know it...I slipped a bit...but it still looks O.K. (takes some practice LOL).....
some simple dots down the side add a little pizazz and break up the solid colors......
you can color fins on and add gills with the red t-shirt paint....(always give the t-shirt paint ample time to dry before handling or moving on)....
you can color the tails to match the body colors.....

then I coat the mouths and the area where the eyes are going to go with 5 minute epoxy and before the epoxy sets up...affix the eyes.....
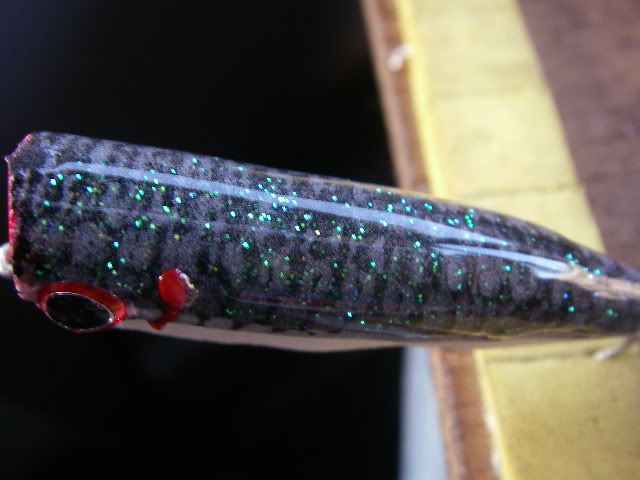
you can also add some glitter and coat the back giving it a glittery finish.....
you can add a reverse scale effect with the clear scale tape.....cut it tapered shape to avoid wrinkles down the side....I also like to round out the front a bit....
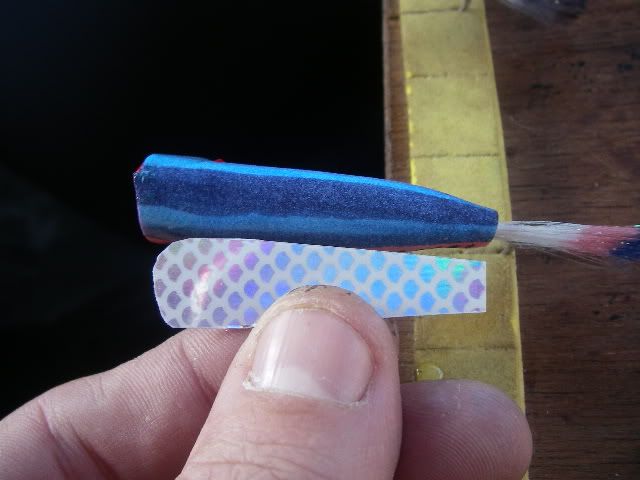
then secure it down on the popper.....
small strips can also be added to the sides for a nice effect.....
Once all this is done....and everything till now has had time to dry....its time to give a final coat with the 30 minute epoxy....and you're done!
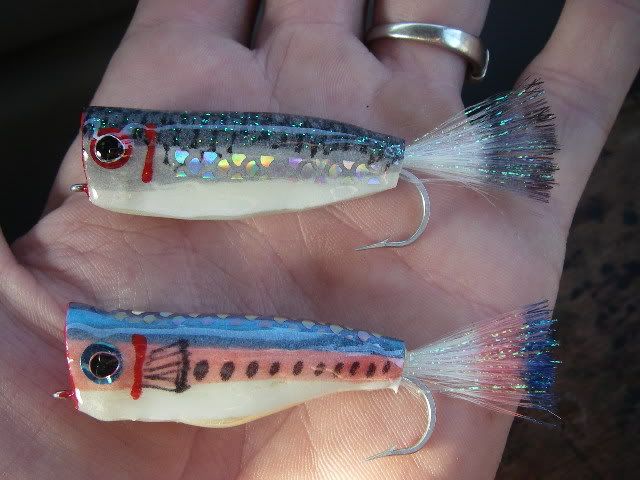
I truly hope you all enjoy making and fishing these as much as I do! now go crazy!
once dried you then use a sharp razor blade to trim the bottom of the body leaving a bit of a belly from the front just behind the eye towards the rear...trim the rear close (maybe 1/16th of an inch) to the hook shank......
the next step is to color the mouth with the red t-shirt paint....just dab it all around inside and along the outter edge...
once the t-shirt paint has had time to dry....its time to color and decorate the poppers....this is the fun part!.....using the prismacolor markers....color the sides (always work from light to dark....and in this case it means bottom to top)....
then add the back color or top color.....
there are several ways of decorating them....one is to put fish sclae patterns on the back using the curtain sheer....cut a small swatch of the sheer just a little bigger than the popper.....then on a piece of cardboard or something paint a big splotch of paint about the size of the popper....lay the swatch over the paint and brush over it....coating the swatch with paint....when you pick it up blow out any holes filled with paint....then strching it out to the side with both hands ...carefully lay it over the back of the popper and pull it snuggly down about 45 degrees on both sides.....give it a few seconds then lift straight up and you should have a good scale print.....and would'nt ya know it...I slipped a bit...but it still looks O.K. (takes some practice LOL).....
some simple dots down the side add a little pizazz and break up the solid colors......
you can color fins on and add gills with the red t-shirt paint....(always give the t-shirt paint ample time to dry before handling or moving on)....
you can color the tails to match the body colors.....
then I coat the mouths and the area where the eyes are going to go with 5 minute epoxy and before the epoxy sets up...affix the eyes.....
you can also add some glitter and coat the back giving it a glittery finish.....
you can add a reverse scale effect with the clear scale tape.....cut it tapered shape to avoid wrinkles down the side....I also like to round out the front a bit....
then secure it down on the popper.....
small strips can also be added to the sides for a nice effect.....
Once all this is done....and everything till now has had time to dry....its time to give a final coat with the 30 minute epoxy....and you're done!
I truly hope you all enjoy making and fishing these as much as I do! now go crazy!
Last edited:
Man! That is awesome.Thanks for sharing the tutorial!
KINGFISHER
Senior Member
OB, awesome poppers and awesome tutorial! I love this new recipe section!
KINGFISHER
Senior Member

KINGFISHER
Senior Member

KINGFISHER
Senior Member
luv2drum
Senior Member
Crawdad
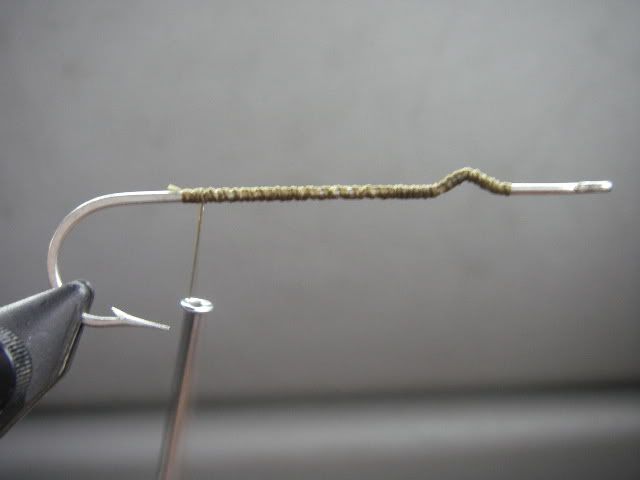
I got this from Winter 2009 Fly Tiers Magazine
Hook #8
cream thread 6/0
antenae/wiskers hackle fibers and stripped quills
legs fine ultra chenile olive or what ever will match, or you can use a clump of hackle fibers for legs
underbody pearl ice dubbing
pinchers two symetrical feathers coated with adhesive. Cut to shape after drying
tail three body feathers coated with adhesive
shell thin foam colored with markers to match feathers etc
Use 50lb test or heavier mono line melted to form eyes, just stick the tag into the foam and then put the sealer over it.
coat everything with a gossy sealer/adhesive and trim tail to shape after it dries.
Attachments

Last edited:
pics?
Lookin Good Kingfisher!

KINGFISHER
Senior Member
Mighty nice Pay!
Similar threads
- Replies
- 0
- Views
- 460
- Replies
- 2
- Views
- 594