Photo tricks of the trade (Tutorials)

leo

Retired Woody's Mod 7/01-12/09
With all of the digital cameras with zoom showing up I thought it might be time to share some of our trade secrets/hard learned lessons.:)

I'll start with my suggestion for getting decent pics though windows.

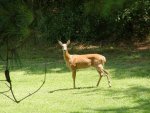
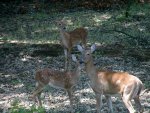
Since I have taken a lot of my yard deer pics through glass I have found that getting real close to the glass, yes even touching it, helps me to get a clearer pic and greatly eliminate the glare.

Here are some I have taken through glass, both a single pane w/storm window and a double pane sliding door.

Keep in mind some of these pics are 3 years old and have deteriorated some, I have since learned to better protect them from deterioration, but thats for another post.:)

Please share some of your helpful methods of getting great outdoor/wildlife pics :clap:


19534885.jpg
 

Attachments

  • doe yd 2 a 1.jpg
    doe yd 2 a 1.jpg
    162.5 KB · Views: 6,067
  • doe yd 3 rs.JPG
    doe yd 3 rs.JPG
    96.3 KB · Views: 5,952
  • family yd 1 rs.JPG
    family yd 1 rs.JPG
    101.9 KB · Views: 6,060
  • fawn yd 4 rs.JPG
    fawn yd 4 rs.JPG
    101.7 KB · Views: 5,960
  • P4010001 j.JPG
    P4010001 j.JPG
    67.4 KB · Views: 6,022
  • P4010002 j.JPG
    P4010002 j.JPG
    177.1 KB · Views: 5,950
  • P4010005 j.JPG
    P4010005 j.JPG
    113.3 KB · Views: 5,951

pendy

Senior Member
Leo

Those pictures are great. It looks like you could just reach out and touch the deer. What kind of a camera do you use.

Aunt Bea
 

leo

Retired Woody's Mod 7/01-12/09
Thanks Pendy

most were taken with my older Olympus 700, which I have now replaced with an Olympus 740 :) the turkey and dove were taken with my 740:)

The 1'st and 3'rd pics, of the doe and the family, were taken through a single pane and a storm window at a distance of about 40 feet.

The other deer were taken thru a sliding Glass door (double) pane and they were at about 60 to 80 yds.

They were all taken in "auto" and they all have been "cropped" and "quick fixed" (adobe photo shop) but the quick fix feature rarely changes any of the pics taken with the Oly's, the size reduction was done with "paint":)

These digital cameras have added a new dimension to my outdoor adventures and rarely do I go in the woods without my camera :cool:
 

Jim Thompson

Live From The Tree
I can offer a couple of tips....

1. Take a huge number of pics. You never know which ones will be successful. Even with a bad pic you can sometimes crop and or do some editing to make it better.

2. ALWAYS use a rest of some sort if you are looking for a very high quality pic or if you will be using much zoom. A tripod is best ($20 walmart) a monopod is second best ($20 walmart) a rock, fence post, front bar on your treestand etc all work fine.

3. If your cam has a remote control, use it even when on the tripod for shots where you have the luxury of doing so. Such as being set up waiting on a sunset shot.

4. ALWAYS carry your camera. The only time I do not have mine when on stand is when there is a threat of rain (or I just forget to grab it) and even then I contemplate it. Just last year not having my camera costs me some great before shots of the 10pt I shot.

We will add to this thread as time goes on.

Jim
 

Handgunner

Senior Member
Answer me this while we're on the subject.

I've been taking pictures on the 640x480 setting.. Would taking them say with the 1280x360 setting or bigger and then resizing, make them any better? Say more crisp?
 

slimbo

Senior Member
Since Delton brought it up........BY ALL MEANS TAKE THE PICTURE AT THE LARGEST SETTING POSSIBLE!!!! You can always take pixels away later but you can never add them.

slimbo
 

leo

Retired Woody's Mod 7/01-12/09
YES, Delton

take them in the biggest size possible then you will have more data to work with:)

Hopefully someone else will explain the reasons better than I can. I just know it works:clap:

RESIZE with PAINT............

With paint I find that the resizing seems to lose less quality than with the other methods of resizing that I have tried:)

SAVE in "TIF" FORMAT....................

Also save in "tif" format as soon as you download the pic from the camera, then make a copy to work on and then reformat to "jpeg" when you are ready to post or send, in "tif" it does not seem to lose data when you store, work, or edit the picture:)

Again hopefully one of our knowledgeable computer people can explain why these things seem to work :)
 

Jim Thompson

Live From The Tree
Leo and Slimbo are correct. Take the photo in the largest and highest quality you can. I take all of mine in the SHQ setting (would take them in Tif setting, but too time consuming and too much space on the card). Then when you load them on your puter you should make a copy first and then you can save your copy in jpeg after doing your editing or resizing.

EVERY time you re-save a photo in jpeg or gif formats you lose data. When you save in Tif format you do not lose enough data to notice.

When posting on the web you are a much nicer person if you do not try and post in the largest formats. The dial upers will talk better of you:)

Jim
 

Hoss

Moderator
One way to see the difference in quality at different settings is to set your camera up on a tripod and take a series of photos of the same subject changing the camera settings for each photo. Try to get something in the photo with some sharp contrasts and straight edges. You can then review these with your photo editing software trying out resizing and cropping. This will give you a good feel for what works best with your camera.
I agree with what others have said concerning quality and size. Use highest quality and largest size. Down side is speed to write to your card effecting how quickly you can get the next shot.

Hoss
 

Jim Thompson

Live From The Tree
one more...this one is often overlooked when trying to shoot quickly.

Most cams have an auto focus that activates when you hold the shutter button halfway down.

WAIT ON IT TO FOCUS!

otherwise you have a half was focused pic.

Jim
 

Nugefan

Senior Member
Great pics...

and lots of critters come by your place...have a question...under the does left eye looks like Wolves that squirrels get ...Is it a sore or just glands swollen ?
 

leo

Retired Woody's Mod 7/01-12/09
Sure looks like it Nugefan

it appears on all of the pics I have of her, it may be on the fawns also??

In this pic there appears to be something near the eyes of the fawns also, but the pic is not clear enough for me to be sure.

Are the "wolves" hereditary??
 

Attachments

  • 63876700ndkwYA_ph.jpg
    63876700ndkwYA_ph.jpg
    196.6 KB · Views: 5,823

MoeBirds

Senior Member
leo,

Cool pics!!!!!
Question:
In; fawn yard 4.........

......is that a "Plot Saver" in the background with the backend of another deer on the other side of it??

Just curious, It looks an awful lot like the same ribbon and stakes.
 

leo

Retired Woody's Mod 7/01-12/09
Greg, that is part of the momma deer in the background,

the piece of conduit and ribbon is there so my neighbor on that side does not drive his lawn mower into a sink area (old construction burial site) that has since been filled in:)

Here is another pic of the whole family in that area:)
 

Attachments

  • 80872006ZuvjWn_ph ex.jpg
    80872006ZuvjWn_ph ex.jpg
    93.2 KB · Views: 5,837

rip18

Senior Member
Here is a common sense one that I forgot earlier today...

Make sure you have enough film in the camera or space on the storage device BEFORE you go to a place you know you want to take a picture. :eek:

We have a family of packrats/woodrats that had taken residence on our back porch. My wife complained when they stole her little candles & ate her plants, & I moved a couple of them earlier. They started stealing MY tools & taking them to their nest, so I got more serious about relocating them. I took the one in the box trap this morning to an old moss-covered log in good light & eased the door open. I went off to the side & waited for him to come out. He poked his head out, came out onto the log, & posed for me. I depressed the shutter release and OUT OF FILM!!!! ARRRGHHH!!! :mad:
 

Branchminnow

GONetwork Senator Area 51
Great pics thanks for the tip.
 

Jim Thompson

Live From The Tree
How to resize photos IF they are on your computer

This tutorial is ONLY for resizing, not other editing.

Go here http://bluefive.pair.com/pixresizer.htm and download the FREE software, save it to your desktop (or anywhere it will be easy to access).

Open the program and click on the top tab called "work with one file" , then click on "Load Picture", then you will need to find your photo in the box that pops up, double click on it.

Then click on what ever size you want the new photo to be, remember that 640x480 is the LARGEST size most forums will allow, although you do not want much smaller than that unless it will be your avatar. Make sure "maintain aspect ratio" is checked and click "save picture".

It will automatically rename your photo to whatever the pics original name was and the new size you chose. Make sure you save it somewhere that you can find it later.

Thats it!

Jim
 

leo

Retired Woody's Mod 7/01-12/09
Great tutorial Jim

Thanks for sharing :clap:

Here is a way that is a little harder for the ones that just want to "mess" with it on their own computer ...( with XP and "paint") ..here is a guide for using "paint" to resize:)

...................................................................

Resizing pictures with paint.............

Make a copy of pic before working.........

Put pic in "paint"

Click on "Images"

Click on "Attributes" .. (This will tell you the size of your pics,) do the math to figure how to reduce the pic to the size you need ...

Click on "Stretch/Skew" and reduce the pics by percentages, I do mine in steps and always do both dimensions equally or pic will look weird.

When the pic is the size you want, click on "file", then click on "save as" and save where you keep your pics I use "my pictures"

............ EXAMPLE ...........

Example ...pic size 1600(width)x1200 (height) ...

Reduce it by 50% (stretch and skew) = 800(w)x600(h)..

Then reduce it by 80% (stretch and skew) = 640(w)x480(h)
 
Top