The Original Rooster
Mayor of Spring Hill
I'm about to rewire my 1991 Lowe 165 boat. The tangle of wires under the dash going to the switches is just ridiculous and the fuse block uses the old glass fuses.
I'm starting from scratch. New switches (none of them work anyway), a fuse board, terminal block, and bus block. I may reuse some of the wire after putting new connectors on them. I'm also adding a main battery switch and a 60 amp breaker to replace the inline fuse on the trolling motor. I'm drawing up a wiring diagram to keep it straight in my head. Anyone ever taken on a project like this before? Any advice would be appreciated so long as it's good advice.
I'm starting from scratch. New switches (none of them work anyway), a fuse board, terminal block, and bus block. I may reuse some of the wire after putting new connectors on them. I'm also adding a main battery switch and a 60 amp breaker to replace the inline fuse on the trolling motor. I'm drawing up a wiring diagram to keep it straight in my head. Anyone ever taken on a project like this before? Any advice would be appreciated so long as it's good advice.

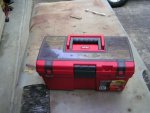
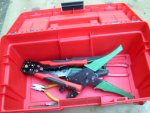
") . I loaded the top with terminals and heat shrink. Last night I worked on the Bug for a bit and the box was awesome. Normally I would have made countless trips in and out of the shop between the wiring supply bins and the job. Now the parts and tools were on the bench.
. I loaded the top with terminals and heat shrink. Last night I worked on the Bug for a bit and the box was awesome. Normally I would have made countless trips in and out of the shop between the wiring supply bins and the job. Now the parts and tools were on the bench.