Kris87
Senior Member
Since I had an Elite E32 in to tune, I thought it would be a good time to show some different grips, and how they affect arrow flight. Grip is a very overlooked thing when shooting and tuning a bow, and certain bows definitely shoot better with certain pressures on the grip. You will see in the pics, I took a marker and drew a line on the top of my hand. This line runs parallel with the big thumb muscle on your palm, or your thumb pad. This line does not run parallel with the lifeline on your hand, I did this on purpose as you'll see.
Ok, first grip I tried here was with the center of the grip dead down my lifeline in my hand. This is probably the most common grip I see guys use. Its often thought that if the grip rests in the V of your hand, you're less inclined to torque it....that's not always the case. You might not torque the grip, but you're applying pressure on the right side of the bow. You can see here, the line of my thumb muscles is point to the right, so there is pressure from it on the right side of the grip. Here's how it would look:
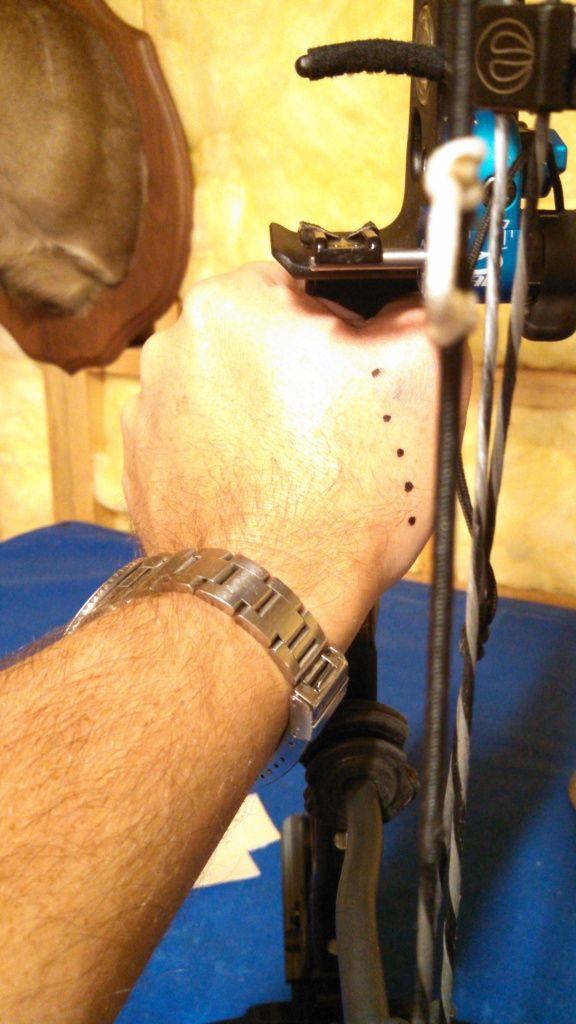
^^This grip produced shot #1 in the coming bareshaft results picture.
Next, since I know that one didn't really work, I tried the grip I normally use on my Hoyts. Typically I line the thumb muscle up dead down the back of the grip. This allows it to act as a fulcrum, and rotates the knuckles toward the target, and downward at a 45 degree angle. I can shoot just about any bow with this grip as it produces very little right or left pressure using the fat thumb pad. You will notice also my hand was lower on the grip here, and that's important. Using this grip, there is a definite gap to the V in your palm at your wrist. Here's how it looks:
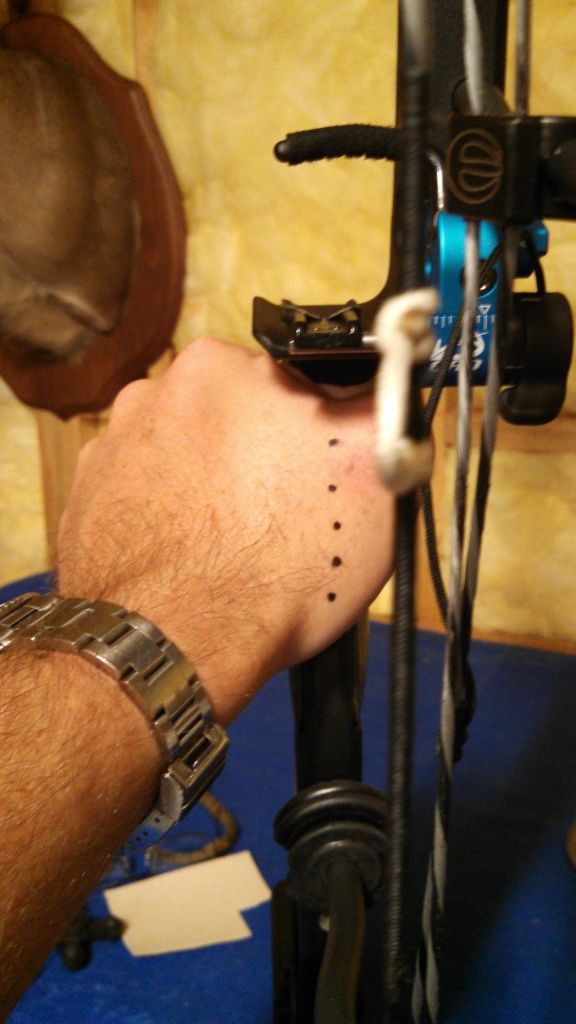
^^This grip produced shot #2 in the coming bareshaft picture.
Next, after seeing what was going on from the first two shots, I knew I needed to move my grip up toward the shelf, and rotate it just a tad back to the right. I thought this was a fairly neutral feeling position, one that I was comfortable with right away. Here's how it looked, and although not a lot different than #2, you can see I moved my hand up close to the shelf, and moved the line of my thumb pad to the right center of the grip.
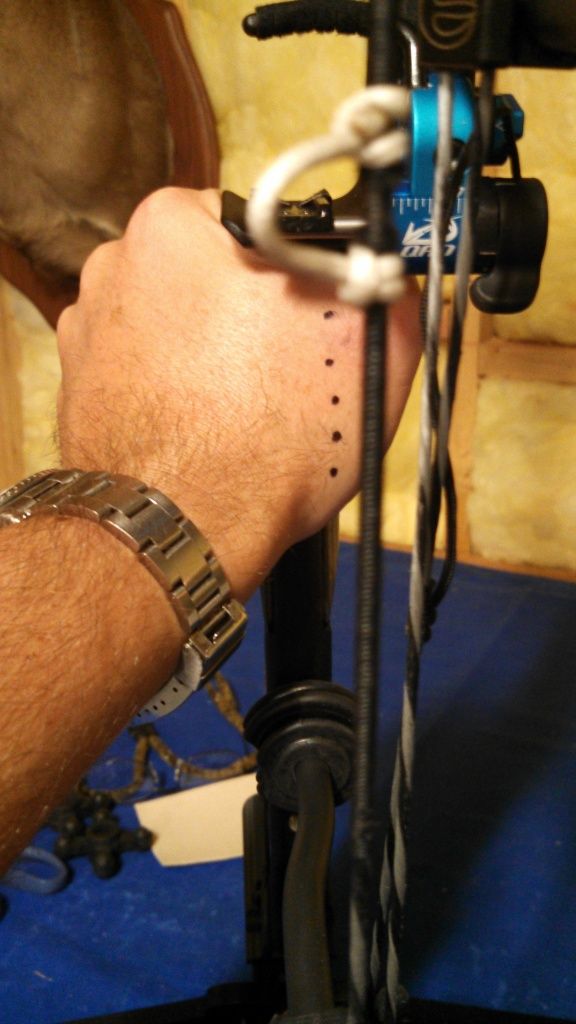
^^That grip produced shot #3 in the bareshaft picture.
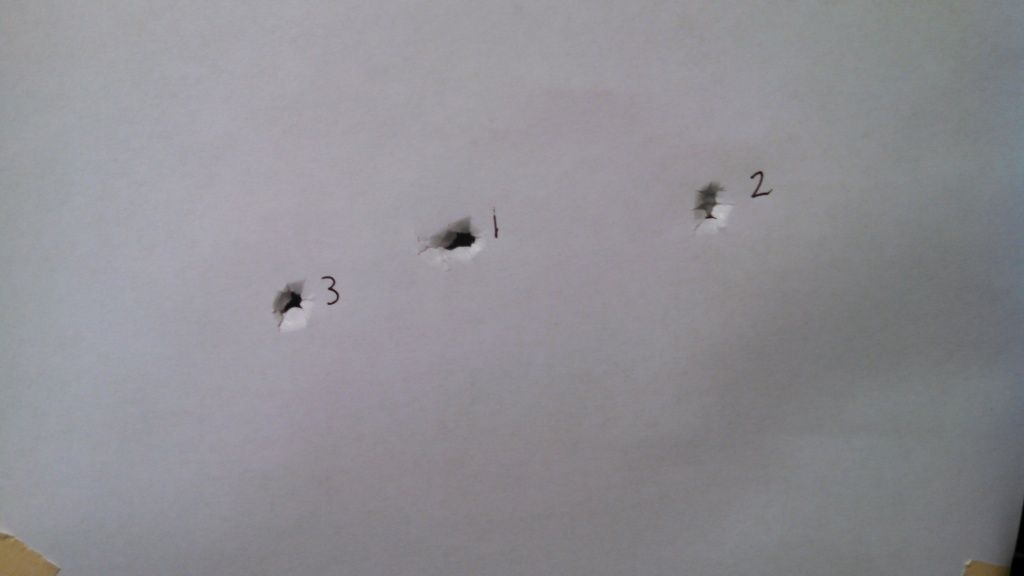
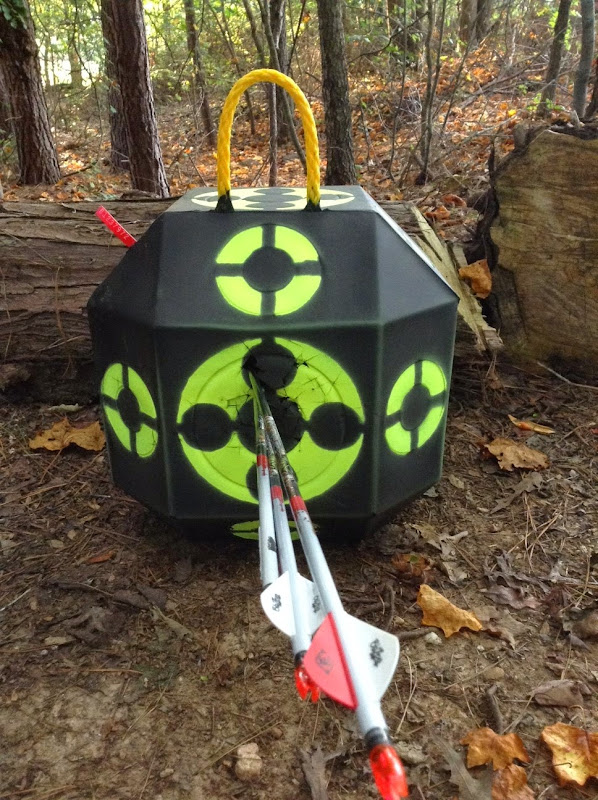
As you can see, shot #1 was a nock left tear. I had too much pressure on the right side of the grip as seen in the first grip picture. Normally when you move pressure to one side of the grip, the tail of the arrow moves the opposite way. i.e. Move grip to the left, the tail of the shaft moves right. You can see shot #2 wasn't that bad, a tad tail low. So that told me I had too much palm or I had too much pressure lower on the grip. Easy fix...I just moved my hand up toward the shelf. You can see in grip picture #3 I moved my hand up flush with the shelf. This brought the tail of the shaft up. I was satisfied with that hole, and shot it a few more times to confirm that was where it was going to shoot best. This was a comfortable grip. If I had to shoot a grip that was way out of whack, then I would have probably gone back and looked at the tune, but since this bow was already at correct centershot, and cams sync'd perfectly, I felt good about it.
Ok, first grip I tried here was with the center of the grip dead down my lifeline in my hand. This is probably the most common grip I see guys use. Its often thought that if the grip rests in the V of your hand, you're less inclined to torque it....that's not always the case. You might not torque the grip, but you're applying pressure on the right side of the bow. You can see here, the line of my thumb muscles is point to the right, so there is pressure from it on the right side of the grip. Here's how it would look:

^^This grip produced shot #1 in the coming bareshaft results picture.
Next, since I know that one didn't really work, I tried the grip I normally use on my Hoyts. Typically I line the thumb muscle up dead down the back of the grip. This allows it to act as a fulcrum, and rotates the knuckles toward the target, and downward at a 45 degree angle. I can shoot just about any bow with this grip as it produces very little right or left pressure using the fat thumb pad. You will notice also my hand was lower on the grip here, and that's important. Using this grip, there is a definite gap to the V in your palm at your wrist. Here's how it looks:

^^This grip produced shot #2 in the coming bareshaft picture.
Next, after seeing what was going on from the first two shots, I knew I needed to move my grip up toward the shelf, and rotate it just a tad back to the right. I thought this was a fairly neutral feeling position, one that I was comfortable with right away. Here's how it looked, and although not a lot different than #2, you can see I moved my hand up close to the shelf, and moved the line of my thumb pad to the right center of the grip.

^^That grip produced shot #3 in the bareshaft picture.

As you can see, shot #1 was a nock left tear. I had too much pressure on the right side of the grip as seen in the first grip picture. Normally when you move pressure to one side of the grip, the tail of the arrow moves the opposite way. i.e. Move grip to the left, the tail of the shaft moves right. You can see shot #2 wasn't that bad, a tad tail low. So that told me I had too much palm or I had too much pressure lower on the grip. Easy fix...I just moved my hand up toward the shelf. You can see in grip picture #3 I moved my hand up flush with the shelf. This brought the tail of the shaft up. I was satisfied with that hole, and shot it a few more times to confirm that was where it was going to shoot best. This was a comfortable grip. If I had to shoot a grip that was way out of whack, then I would have probably gone back and looked at the tune, but since this bow was already at correct centershot, and cams sync'd perfectly, I felt good about it.