Photo tricks of the trade (Tutorials)

LJay

Retired Mod
Nice pics, fine looking family. Wonder where papa is??????
 

GaBubbaLew

Member
Last edited:
A#1: USE A TRIPOD!! OR A LEANING POST!!! This tip alone will increase the quality of your images by 1000%

A#2: KEEP YOUR LENS CLEAN!!! Lens wipes are cheap and you can get them at any photo store or walmart. Use them before, after and during every trip. Your pictures will be clear and crisp.

1. Look at your subject from an artistic viewpoint: Don't always center your subject, a slightly offset subject will add character to the photo. When taking pictures of people holding fish/deer try taking some pictures while the camera is close to the ground and some where the camera is elevated (ie, while standing on the bed of a truck) this will add a different perspective to your photos. Experiement from different viewpoints to give your photos character.

2. Try to judge the way lighting is going to effect your subject. Full sun is not always the best place to take pictures. look at your subject and see if any 'hard shadows' appear (ie, sunny on the face, shadow on the fish) shadows will cause portions of your subject to be over or under-exposed. Overcast or cloudy days are great for getting High Definition Clear and Consise Photos. Also, on a sunny day try to find a shady spot under a canopy of trees with the background of the picture also shady.

3. Carry extra memory cards with your camera. There is nothing more frustrating than being in the field, having a great shot and finding out your memory card is full and having to go back and delete photos.

4. Like Jim said Take lots of pictures!!!! When you get home and look at the pics on a computer you will be amazed at how some pictures you thought would turn out good look horrible. And some you don't even remember taking turn out to be incredible images.

5. Depth of Field: When you zoom in on a subject and focus on the subject all areas of the picture farther away and closer than the subject will not be in focus. This comes in handy when you want to draw all attention to the subject being photographed. The best way to try this out is to go out in the yard and find a tree trunk. Zoom all the way out and take a picture of the tree trunk from 5 feet. Then back away10 or 20 feet and zoom in on the tree trunk, focus on the tree trunk allowing the trunk to take up half of the viewfinder and take another picture. Go inside and pull the pics up on your computer. If done correctly you will notice a vast difference. In the picture where the zoom was used the tree trunk will stand out from its surroundings focusing all attention in the picture on the tree trunk. Now take this concept and apply it to other pictures where you want your subject to stand out (ie, fishing, hunting and game pictures.) Many times getting as close as you can to the subject is not going to produce a quality image. Try backing up a little and zooming in some.

6. The Human Factor. Try taking pictures without the subject knowing that you are photographing them. Often a natural facial expression will make a great photograph. When you tell someone that you are going to take a picture of them they all give you the same cheesy smile or grimmace. Try catching people using their natural expressions of happiness, saddness or anger. THE SUBJECT DOES NOT ALWAYS HAVE TO BE LOOKING DIRECTLY AT THE CAMERA!!! This holds true for subjects of all ages and experiences. For Example: A picture of a Grandad and His Grandson after the Grandson has taken his first deer. A straight on picture will show nothing more than the people and the game. But.... Take a picture of the grandsons face while he is admiring his grandfather for all that he has taught him and all that he has learned then you have yourself a picture. Hang back away from the crowd and snap pictures without anyone knowing. Campfire pictures are also great if there is enough light.

7. **IMPORTANT** DO NOT USE DIGITAL ZOOM!!!!! Turn it off on your camera!!! Everything that digital zoom does can be done from a computer with much greater clarity. Digital zoom in cameras causes pixelation which makes the images look grainy and sloppy. Please if you do not listen to anything else I have said please listen to this your pictures will turn out better and your memories afield will last forever. Turn Off The Digital Zoom!!! Refer to your Owners Manual if you are unsure how to do this.


Hope this helped out. The best way to take better pictures is to take alot of them and learn from your mistakes. Remember there is no right or wrong way to take a picture. Experiment!! Digital cameras are great for this because you don't have to pay for development to see your pictures. If they turn out bad just delete them.
 

Jim Thompson

Live From The Tree
Posting multiple photos in a thread & have them all show up by using Photobucket.com

1. Go to www.photobucket.com and register. It will send you a confirmation email. Go to your email and click the link and it will log you in. Go to "account options" and make sure the option for "display img" is checked yes.

2. After you login you will have an option in the middle of the screen to upload photos. Click on "Browse" , then find the photo which is on your computer and hopefully already resized.

3. Click on "submit"

4. Scroll down to find the photo you just loaded and click on the "img" address which is below the photo. It will automatically highlight the address, then hit the right mouse button and choose "COPY".

4. When making a post here you would type what you want and then when you are ready for your photo to attach, hit the right mouse button again and hit "PASTE". It will enter the code you copied a minute ago and when you hit reply your image will be there.
 

Bubba_1122

Senior Member
You do need to keep your lens clean. But be careful. Use less first (air). Then soft brush. Clean microfiber cloth.

You never want to scrub/wipe gritty dirt. You'll ruin the lens.

Also, I understand any cleaner with ammonia will take the coatings off the lens.

Also, go read up on the Rule of Thirds. I know most aren't interested in being all that artistic with our photos. But still, we want it appealing to the eye.

I spent hours at my duck pond on the last full moon trying to get a picture of the ringnecks leaving the pond right at dark.

What I was trying to do was get a pic of a group of ducks flying in front of the full moon.

I drove 30 miles, got my camera equipment together, and then sat on a dike for about 45 minutes waiting on the ducks to leave to go to roost.

Never got the pic, but sure enjoyed watching the ducks flying everywhere else but in front of that moon. And will be back trying again.

With digital photography, any of us can have a mighty good time taking pictures. And the cost is hardly anything once the equipment is bought.
 
Last edited:

leo

Retired Woody's Mod 7/01-12/09
Great advice Bubba_1122

With digital photography, any of us can have a mighty good time taking picture.

and a very true statement:yeah:

Thanks for sharing the knowledge with us:clap:
 

NOYDB

BANNED
I agree with the earlier comment. USE FILTERS.

At minimun you want to have at least a UV and a Polarizing filter.
 

leo

Retired Woody's Mod 7/01-12/09
Good point NOYDB

I agree with the earlier comment. USE FILTERS.

At minimun you want to have at least a UV and a Polarizing filter.

Using filters is an area that I do not know much about at all:confused: .. maybe there are others that need/want some info on then too.:D

With all of the fine pic takers we have, pro and amateur, hopefully some will share some guidelines with us on what types do certain things and when to use the different types of filters:clap: :clap:

Thanks in advance all:D
 

leo

Retired Woody's Mod 7/01-12/09
Anyone want to share some info on filters

Using filters is an area that I do not know much about at all .. maybe there are others that need/want some info on then too.

With all of the fine pic takers we have, pro and amateur, hopefully some will share some guidelines with us on what types do certain things and when to use the different types of filters

I recently got a polarized filter for my Oly SP-500UZ and I have experimented with it some, and so far I have not really seen any difference it using it or not:confused:
 

Hoss

Moderator
If you are interested in learning more details on the settings used for photos, there are programs which will display the camera settings. The one that I have is View EXIF. By right clicking on the photo and selecting the program from the drop down menu, I get to see the information shown below. The information may not be available dependent upon the equipment used or the software used to porcess the file, but it can be interesting and an aid in understanding the camera setting used when the photos were taken.
The link to the website for ViewEXIF is http://ak.no-ip.com/EXIF/index_en.htm


Hoss
 

Attachments

  • photo properties.JPG
    photo properties.JPG
    135.5 KB · Views: 4,506

leo

Retired Woody's Mod 7/01-12/09
Secrets on great color in a lot of the pics

As I have been really impressed with the color in a lot of the pics posted, I ask some of the members to share with us some of their secrets....:)

Here is the thread with some of their replies:clap:

http://forum.gon.com/showthread.php?p=668550#post668550

Thanks All for sharing:yeah:
 

slimbo

Senior Member
Filters. Hmmmm. Yes and no. If you are gonna use a filter, make sure it is a good on and make sure its clean. When you buy a $1000 lens, you are paying for the glass. In other words all glass is not the same. The better the lens, the better the glass. If you put a junk filter on a good lens its like looking through a dirty window that wont clean. However, filters can be very beneficial if you use the right one in the right situation. If you have ever noticed a glare on the pic when you are shooting in bright light, the polarized filter will cut that out. Other filters do other things and some are more effective than others.

In a nut shell. I use filters a lot, but if its not neccesary, dont use it. Its just another piece of glass to look through.

slimbo
 

mmarkey

Senior Member
Filters

Filters are mainly for FILM uses. Unless you're using filters for special effects in your digital camera or perhaps a polarizing filter. But many of the filters that used to be commonly used, already have built-in settings available in digital cameras that compensate for different lighting. Eliminating the need for filters.

As far as shooting as large as possible. I agree. BUT, my camera Largest setting is TIFF setting which is huge, so large that even downloading the image from my camera is an ordeal. I think my 256mb card will only hold 16 TIFF images. I usually shoot in SHP mode. It's a trade off with what you're Technology or pocket book can afford.
 

Handgunner

Senior Member
If you are interested in learning more details on the settings used for photos, there are programs which will display the camera settings. The one that I have is View EXIF. By right clicking on the photo and selecting the program from the drop down menu, I get to see the information shown below. The information may not be available dependent upon the equipment used or the software used to porcess the file, but it can be interesting and an aid in understanding the camera setting used when the photos were taken.
The link to the website for ViewEXIF is http://ak.no-ip.com/EXIF/index_en.htm


Hoss

Hoss, I got that downloaded, but am using Firefox. For some reason I can't drag the ViewEXIF file into my Extensions. :huh:

Any ideas?

This is the step I'm having problems with...

step 6. Drag viewexif.xpi to extension window .
step 7. Install it .
 

Handgunner

Senior Member
I got it fangered out, Hoss.

For some reason it worked this morning, but not last night. Maybe I wasn't holdin' my tongue right or sumpin'... :huh:
 

Hoss

Moderator
Gotta love talent Delton. Now just remember how you were holding your tongue. Also, I 've found it real helpful to note the wind direction.

Hoss
 

bigox911

Senior Member
2 tools that I've been learning with lately.

One is a free photoshop style program called paint.net and can be found here

http://www.getpaint.net/index.html

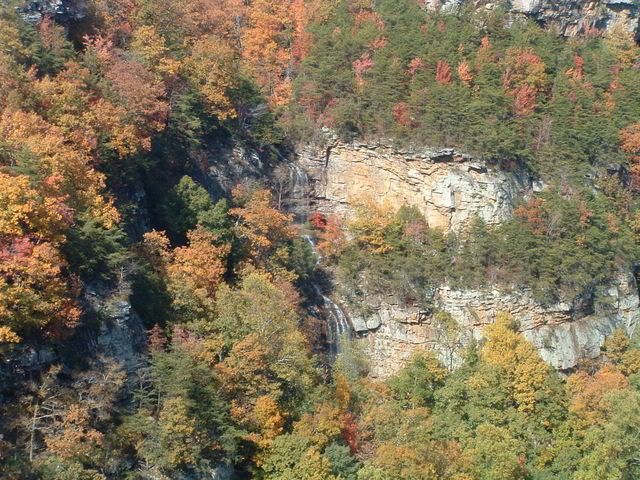
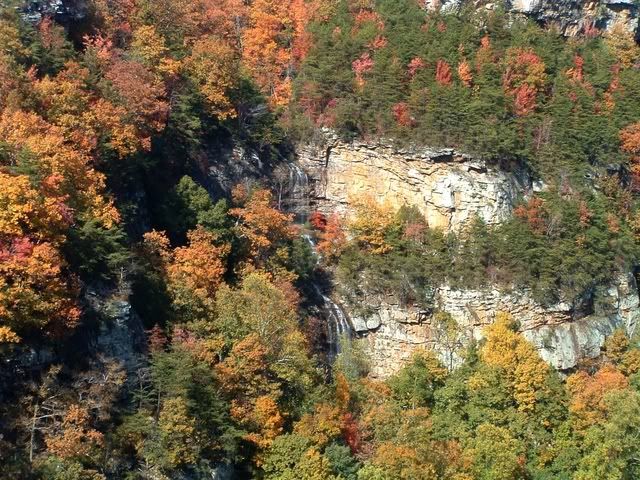
I'm sure this thing can do alot more than I've even started to do yet, but here's an example of some color changes that take about 4 clicks.
Before
Outdoors036.jpg

After
Outdoors0361.jpg


Another program I just got today is called autostitch. It's also free and can be found here...

http://www.cs.ubc.ca/~mbrown/autostitch/autostitch.html

It's real easy to use. You just have to open the program, select the photos you want stitched, and it does everything for you. It gives you an output file and you can use that 1st program to crop/adjust it till you get it as you like.

output
pano.jpg


croped/adjusted
CloudlandPano1.jpg


Hope some of this helps!
 

merc123

Senior Member
You can use MS Paint also (included in windows).

Open the image and click Image, Stretch/Skew

When the dialog box opens change the "Stretch" % to something less than 100%.
 
Top