A Bow Build-Along for Evan!**COMPLETED PICS**

longbowdave1

Senior Member
Last week me and Mike were sitting around the campfire with friends at the Northwoods campground. During conversation, a friend asked if i had any of my bows along. Well before i new it, Mike was carrying a couple out to pass around the fire. Ms. Karen really liked the bows and asked if I would make one for her 5 year old grandson Evan, I grinned from ear to ear and said yes! Building the kids bows is a special privledge for me. This will be Evans first "real bow" and he will have his dad who is a bowhunter, to teach him. This could be the bow he will always remember from the faded picture, when he is grown and has kids of his own. Being a gift from his Grandma will make all the more special. Maybe his Dad will even come to the trad side?????
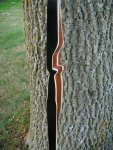
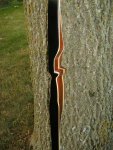
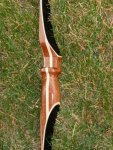
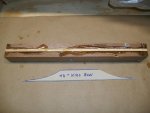
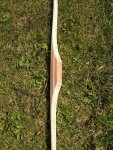
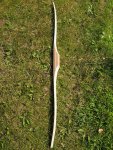
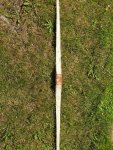
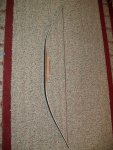
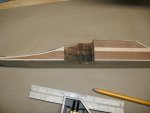
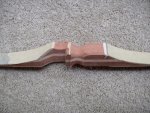
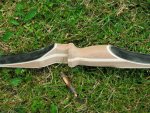
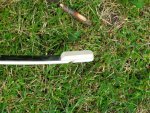
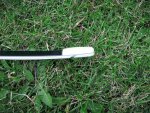
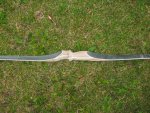
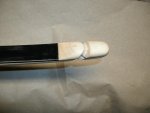
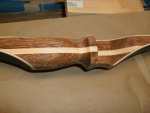
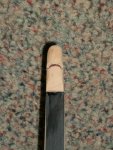
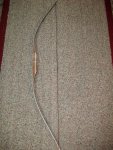
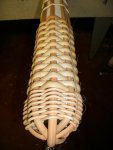
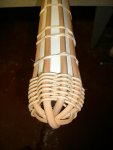
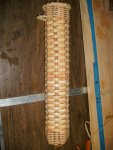
I'm going to make a sweet little 48" R/D longbow for him. Going to be a classic looking bow with Sapele', Hard Maple and black glass.Thought i would even through some hard maple tip overlays to really contrast the black glass. A sweet soft leather hadle wrap and he will be in business! I guess the boy will need a quiver and some arrows too, sound like a complete package coming his way.


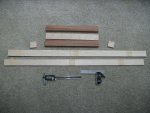
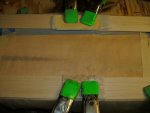
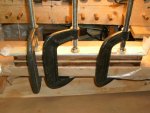
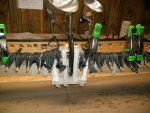
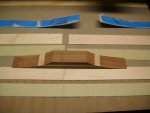
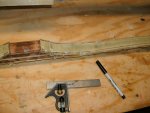
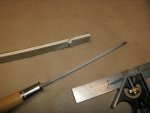
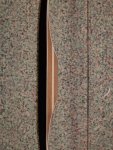
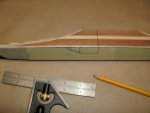
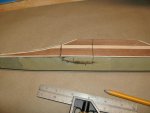
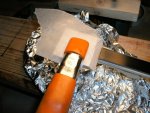
Tonight i cut all the laminations and the riser pieces i will need. Got the lamination pairs glued and the riser block as well. The glass should be waiting for me tomorrow when i get home. I'll try and get it glued up tomorrow night.
 

Attachments

  • Evan's bow 1 001.jpg
    Evan's bow 1 001.jpg
    156.2 KB · Views: 1,109
  • Evan's bow 1 002.jpg
    Evan's bow 1 002.jpg
    63.1 KB · Views: 1,029
  • Evan's bow 1 003.jpg
    Evan's bow 1 003.jpg
    116.1 KB · Views: 1,027
Last edited:

whossbows

Senior Member
hey dave ,i will be glad to make him a side quiver,right or left?
 

longbowdave1

Senior Member
That's very generous of you, but i promised Ms. Karen i would make him a Woodland weave back quiver too. I have some genuine BigJim kids arrows for the bow too.
 

whossbows

Senior Member
good deal,,get them when they are little,make a fine archer someday,now you got me fired up again,i have enough of the flaming box elder to make another bow,guess i need to get started in a day or to,look for another build along,
 

longbowdave1

Senior Member
I'm sure it will be another good looking bow! Post some pictures1
 

jerry russell

Senior Member
Looks like more seeds for the roots of archery...

Thanks guys for making a big difference.
 

Ellbow

Senior Member
Dave you are so talented. You are such an asset to trad archery! Thanks for all you do....by the way got the sticker! Thanks again!
El
 

longbowdave1

Senior Member
Thanks El but I'm just one small potato in the pot of traditional stew! :rofl::rofl::rofl:

Day 2 and the bow is in the oven!:banana::banana::banana:

A little shaping of the riser block, final prep on the lamimnations, and prepping the glass, and it' was ready for the glue-up and then the oven. :whip::whip::whip:
 

Attachments

  • Evan's bow 2 005.jpg
    Evan's bow 2 005.jpg
    118.2 KB · Views: 1,002
  • Evan's bow 2 004.jpg
    Evan's bow 2 004.jpg
    63.4 KB · Views: 1,170
  • Evan's bow 2 003.jpg
    Evan's bow 2 003.jpg
    96.8 KB · Views: 935
  • Evan's bow 2 002.jpg
    Evan's bow 2 002.jpg
    79.5 KB · Views: 925
  • Evan's bow 2 001.jpg
    Evan's bow 2 001.jpg
    83.3 KB · Views: 979

longbowdave1

Senior Member
Tomorrow I'll pull the sticky, curvey mess off the form and with any luck, I'll have a string on it for the first time!
 

Attachments

  • Evan's bow 2 006.jpg
    Evan's bow 2 006.jpg
    147.3 KB · Views: 946

longbowdave1

Senior Member
Tonight was a good night working on Evan's bow. I pulled it from the form, traced out the limb pattern, and cut them to shape. After some sanding, it was time to cut in the string grooves and string it up for the first time. I heard the heartbeat of a new longbow today!:fine:
After tracing out the sight window, I cut it on the bandsaw, and finished up with the hacksaw. A little bit of work with the file, and we have a roughed out sight window. Finished up the day by gluing on the Hard Maple tip overlays.:cool:
The next step is to sand, sand, and sand some more on the riser as well the rest of the bow. It's really taking shape now! :banana::banana::banana:
 

Attachments

  • Evan's bow 3 005.jpg
    Evan's bow 3 005.jpg
    331.1 KB · Views: 903
  • Evan's bow 3 004.jpg
    Evan's bow 3 004.jpg
    341.6 KB · Views: 935
  • Evan's bow 3 003.jpg
    Evan's bow 3 003.jpg
    344.7 KB · Views: 883
  • Evan's bow 3 002.jpg
    Evan's bow 3 002.jpg
    63.4 KB · Views: 916
  • Evan's bow 3 001.jpg
    Evan's bow 3 001.jpg
    98.8 KB · Views: 931

longbowdave1

Senior Member
Taking shape!
 

Attachments

  • Evan's bow 3 006.jpg
    Evan's bow 3 006.jpg
    93.6 KB · Views: 886
  • Evan's bow 3 007.jpg
    Evan's bow 3 007.jpg
    156.7 KB · Views: 894
  • Evan's bow 3 008.jpg
    Evan's bow 3 008.jpg
    123.8 KB · Views: 846
  • Evan's bow 3 009.jpg
    Evan's bow 3 009.jpg
    78 KB · Views: 847
  • Evan's bow 3 010.jpg
    Evan's bow 3 010.jpg
    89.8 KB · Views: 884

longbowdave1

Senior Member
I like to think of it as " a bow just like the grown ups use" rather than a kids bow because I use all the same materials and steps on the little guys! :flag:
 

Attachments

  • Evan's bow 3 013.jpg
    Evan's bow 3 013.jpg
    126 KB · Views: 879
  • Evan's bow 3 012.jpg
    Evan's bow 3 012.jpg
    77.3 KB · Views: 869
  • Evan's bow 3 011.jpg
    Evan's bow 3 011.jpg
    76.9 KB · Views: 863

longbowdave1

Senior Member
Thanks John.:D


Day 4 and the little bow is ready for the spray booth. :banana::banana::banana::banana:
It was an afternoon of sanding and shaping the riser, cleaning up the tip overlays and sanding the glass. Tomorrow I'll spray the finish on!
 

Attachments

  • Evan's bow 4 001.jpg
    Evan's bow 4 001.jpg
    113.3 KB · Views: 954
  • Evan's bow 4 002.jpg
    Evan's bow 4 002.jpg
    215.8 KB · Views: 896
  • Evan's bow 4 003.jpg
    Evan's bow 4 003.jpg
    226.8 KB · Views: 913
  • Evan's bow 4 004.jpg
    Evan's bow 4 004.jpg
    243.5 KB · Views: 894
  • Evan's bow 4 005.jpg
    Evan's bow 4 005.jpg
    292.9 KB · Views: 935

longbowdave1

Senior Member
I'm liking the simplicity of the color sceme and the maple tip overlays contrasting the black glass.
 

Attachments

  • Evan's bow 4 009.jpg
    Evan's bow 4 009.jpg
    65.2 KB · Views: 865
  • Evan's bow 4 008.jpg
    Evan's bow 4 008.jpg
    92.1 KB · Views: 897
  • Evan's bow 4 007.jpg
    Evan's bow 4 007.jpg
    151.6 KB · Views: 887
  • Evan's bow 4 006.jpg
    Evan's bow 4 006.jpg
    126 KB · Views: 878

longbowdave1

Senior Member
Thanks Dave, i think your going to like the finished product.


Day 5. I sprayed four coats of finish on the bow this morning, we'll see how she looks in the morning. While I was waiting for the bow to dry, I picked up some more supplies for Evan's quiver and cut the pieces needed for the build. I down sized to 3/8" reed from the 1/2 " reed I use for the adult quivers. I just finished weaving the quiver tonight, 3" diameter and 18" long.


P.S. The little ol' ladies at the basketry shop say hey to ya'all!
 

Attachments

  • Evan's quiver 005.jpg
    Evan's quiver 005.jpg
    75.9 KB · Views: 812
  • Evan's quiver 004.jpg
    Evan's quiver 004.jpg
    80.9 KB · Views: 789
  • Evan's quiver 003.jpg
    Evan's quiver 003.jpg
    66.1 KB · Views: 801
  • Evan's quiver 002.jpg
    Evan's quiver 002.jpg
    116.5 KB · Views: 835
  • Evan's quiver 001.jpg
    Evan's quiver 001.jpg
    150 KB · Views: 839

longbowdave1

Senior Member
The quiver will dry overnight and tomorrow I will manicure all the loose stuff and spray the Walnut stain/sealer on the quiver. Then it will be back to the bow. Leather wrap on the riser, calf hair rest, and string silencers.:fine::fine::fine::fine::fine:
 

Attachments

  • Evan's quiver 006.jpg
    Evan's quiver 006.jpg
    133.2 KB · Views: 1,270

pine nut

Senior Member
What a great thing you are doing! You are touching and molding a child's life. Great work as well. Bless you!
 

longbowdave1

Senior Member
Thank you Mr. pine nut! I always love to get the chance to get a bow in the kids hands, When Ms. Karen surprises Evan and his dad with this little bow, then Dad shows him how to noc an arrow, draw the bow, and let the that arrow fly, PRICELESS!


Day 6. Now we get a sneak peak at the finished bow! I thinned down the catalzed varnish to get a nice gloss finish. After a cup of coffeee and some breakfast I will complete the details on the bow, and spray the quiver.

:pop:.........
 

Attachments

  • Evan's bow 6 002.jpg
    Evan's bow 6 002.jpg
    225.7 KB · Views: 821
  • Evan's bow 6 003.jpg
    Evan's bow 6 003.jpg
    201.3 KB · Views: 799
  • Evan's bow 6 004.jpg
    Evan's bow 6 004.jpg
    153.2 KB · Views: 776
  • Evan's bow 6 005.jpg
    Evan's bow 6 005.jpg
    205.4 KB · Views: 798
Top