Antique Doorbell Help

SarahFair

Senior Member
I am posting this here because I know we have a lot of out of the box thinkers when it comes to fabrication.

I have an antique doorbell.
I'm actually marrying 2 doorbells together because the original bell has a very poor thudding ring, while the bell I want to use has a beautiful higher pitched ring you can hear through the whole house.
Unfortunately, I do not have the original turn knob for the better sounding bell.

The "key" post does not fit the slot to the gear, it's too skinny, so it's not catching the gear in order for it to turn.
I've tried filling it with everything I can think of, toothpicks, metal wire strips, brad nails, paper towel, etc, it all ends up slipping out after awhile.

Because of the configuration of each bell, gears can not be swapped.

Any ideas on a permanent* filler?

Permanent* meaning the bell has to come off from time to time for door maintenance or cleaning the bell.

20220428_082736.jpg20220428_082729.jpg20220428_082752.jpg
 

longbowdave1

Senior Member
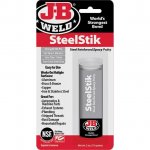
A possible solution by by to use JB Weld 2 part putty on the post. Clean the post with a wire brush. Mix a small bit of the putty on all 4 sides of the mating area of the post. Let it harden a few hours even though it says a few minutes on directions. Then, using a small file, file the putty down to shape to fit the bell. The JB weld is quite strong and should hold up. That is what I would try.
 
Last edited:

JustUs4All

Slow Mod
Staff member
^^^ The JB weld is a great idea. Take a guess and let it cure before you try it in the hole. If you get too much, sand it down. If you get too little, build it up more. ONce cured it should last several lifetimes.
 

longbowdave1

Senior Member
Sarah, the JB Weld is easy to work with. You simply slice off a small section off the roll, and knead the putty with you fingers to mix it. It is all pre-measured, with one part of the epoxy on the outside of the roll, and the 2nd part in the center of the roll. If you slice off about a 1/8" thick slice from the roll, it will be plenty to use for your repair. You can do it! Easy peasy.
 

SarahFair

Senior Member
I love those doorbells. I managed to save the one from my G-Grandmother's home and have it on my front door.
They are awesome. A lot of people surprisingly don't know how to use them and still knock, but the walls inside of my house are so thick, I dont usually hear the knocking
 

specialk

Senior Member
if you could get a micrometer and measure the square hole dimensions i bet a clock repair shop would have a key to fit....ive got an antique winding clock and it uses a key like that....square.....
 

Donal

Senior Member
I am posting this here because I know we have a lot of out of the box thinkers when it comes to fabrication.

I have an antique doorbell.
I'm actually marrying 2 doorbells together because the original bell has a very poor thudding ring, while the bell I want to use has a beautiful higher pitched ring you can hear through the whole house.
Unfortunately, I do not have the original turn knob for the better sounding bell.

The "key" post does not fit the slot to the gear, it's too skinny, so it's not catching the gear in order for it to turn.
I've tried filling it with everything I can think of, toothpicks, metal wire strips, brad nails, paper towel, etc, it all ends up slipping out after awhile.

Because of the configuration of each bell, gears can not be swapped.

Any ideas on a permanent* filler?

Permanent* meaning the bell has to come off from time to time for door maintenance or cleaning the bell.

View attachment 1148742View attachment 1148743View attachment 1148744
I would straighten the key and fabricate a square bushing for the socket. Install the bushing with a slip fit. The key will engage the bushing and disengage when ever you disassemble. I will fabricate the bushing, if you like. Just let me know and I will post how to record the dimensions for the bushing.
 
Last edited:

Pig Predator

Useles Billy’s Fishel Hog Killer ?
Wrap the key with teflon tape and pack the jb weld around the key in the opening. The jb weld won't stick to the key from the teflon barrier. After it cures the key should pull right out and be formed perfectly without having to file anything much hopefully.
 

Anvil Head

Senior Member
DO NOT use the quick set JB Weld! Make sure it is the long cure. The 5 Minute stuff will fail in a few years and the debre may fall back into the mechanism and cause other issues. Fast cure is junk.
 

SarahFair

Senior Member
I used the JB Weld steel stick because it seemed like it'd give me the most play

I'm glad to say, I think its going to work!
I just formed it around the shafts and smoothed it, testing its fit as I did, so no need to file.

20220504_170102.jpg
20220504_170142.jpg
 
Top