Welcome Guest!
Are you pathing or using a majic wand or using the eraser?
Depending on how washed out it was you might have been able to save it in Levels by adjusting the high end colors. (assuming you're using photoshop?)
") )
)
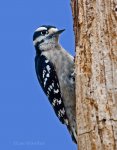
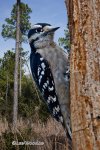
After getting lee's permission to down load his pic and adjust it to show him MY WAY of adding some sky color, here are the results.... along with the steps I took to do it (hopefully I didn't leave any out
Lee, there are usually a few different ways to do things in PSE, this is how I did it. Many people do it different and each individuals way is “BEST’ if for no other reason than it’s their way.
As I have limited comp. and PSE skills I choose an easy way
......................................
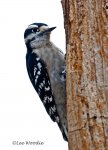
Add Sky Color
1. SELECT QUICK SELECTION TOOL AND ISOLATE THE W/PECKER AND TREE FROM THE SKY.
2. SELECT PAINT BUCKET TOOL W/BLACK FOREGROUND COLOR …. ( SET AT: DARKEN, OPACITY 25%) …. FILL ALL BLACK AREAS OF THE BIRD TO GET RID OF THE SLIGHT BLUE TINT.
3. SELECT INVERSE
4. LEFT CLICK ON FOREGROUND COLOR ….. CHOOSE SKY COLOR OF YOUR CHOICE FROM THE COLOR PICKER VERTICAL BAR… CLICK OK.
5. SELECT PAINT BUCKET TOOL (SET AT DARKEN, OPACITY 25%) ….. ADD COLOR TO SKY, EACH CLICK WILL ADD BIT MORE COLOR.
6. CONTROL D WILL REMOVE THE SELECTION LINES
.................................................
Lee, there are usually a few different ways to do things in PSE, this is how I did it. Many people do it different and each individuals way is “BEST’ if for no other reason than it’s their way.
Second that.nice work Lee
Undo has become my friend
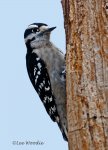
Y'all both did a good job, but it got my noggin to thinking, so asked if I could replace the background as well to show a slightly different method.
1. I used the magic wand tool to select the white sky.
2. Then I feathered the selection by 2 pixels so that I wouldn't have an ugly, hard edge. Then I selected the inverse (so that I had the tree & signature instead of sky).
3. After feathering by 2 pixels, I saw that it had "messed" up the selection on Lee's copyright, so then I went down & re-selected the letters in the copyright carefully to make sure that I had all the parts (& the re-selected them again while adding a few more white pixels for the forest background).
4. Then, I copied the selection.
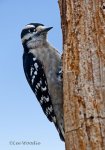
5. Then I opened an existing file of mine (once each for the real sky shot and again for the pine woodland shot) and resized it to be the same size as Lee's original.
6. Then I pasted Lee's bird, perch, and signature into the open file & saved each of the two new creations...
Just a slightly different way to replace the background... Like Leo said, there are often many ways to do things. Sometimes one way works better than another in a given situation. The more ways you know to do something, the better you can often fit a given situation.
* Note: Using the gradient tool to shade the blue in Leo's method would have resulted in something similar to the real sky shot below as well...
 but the bird looks like a giant to me w/ that background. Good idea though to add the trees.
.......... there you go raising that bar again
You're the one who got me to thinking...