My Today's Projects

Jester896

Senior Clown
First up was this

IMG_1641.jpg

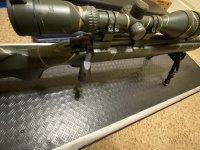
I'm not sure if everyone remembers the paint scheme that was on that .308LTR I picked up
IMG_1600.jpg

I thought that I would strip it to check what was underneath :huh:
The first thing I did was remove the recoil pad so nothing would happen to it.
Top screw came out fine but I couldn't get the bottom out...it seemed loose but the pad wouldn't pull away. I decided to take it to my buddy's yesterday to help me figure out sup.

We finally decided the bottom screw was stripped in the stock. We decided to use a double ended blade from a utility knife to gently tap between the pad backing plate and the stock. We got it in both ends but it was still being difficult. We could see the sides came loose but the ends were still attached. We kept at it and it came off.

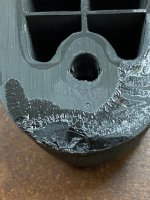
It appeared it had been glued on with what looked like Super Glue. So naturally it damage the stock as well as the backing plate for the pad. Sorry I didn't think to snap a few while we worked. We resurfaced the face of the stock and the recoil pad to remove the damaged area.
IMG_1642.jpg
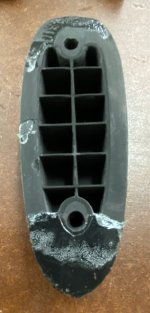
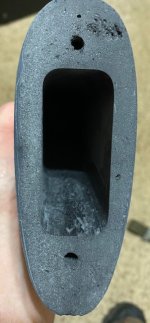
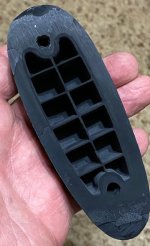
The stock cleaned up pretty good on the table top belt sander except for those few pits and I think that I think will be fine. The recoil pad didn't clean up as well and cracked in a few spots.
IMG_1644.jpg

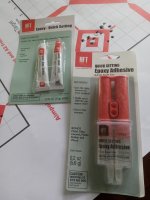
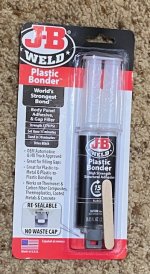
I am going to use this to attempt to repair the pad and fill the voids. I'll put some release agent on some tin so it come off easy and try to reshape it when the epoxy dries
IMG_1643.jpg

If not I will replace it. I am going to dowel the bottom hole with a maple golf tee and wait for the glue to dry, pilot drill it, thread it and then put a couple drops of thin super glue in the threads (helicoil if you will) and that should make the repair pretty hard and we should be back in bidnees

Making me a Burrito Bowl and slicing some avocado for lunch then getting back after it.
 
Last edited:

Jester896

Senior Clown
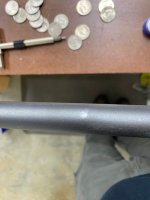
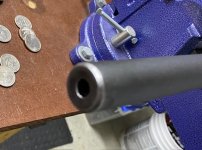
Got the barreled action done. Found one spot the matte blue was missing and around the muzzle a bit.
IMG_1646.jpg
IMG_1647.jpg
I do need to go back over the lettering on the barrel. I used zylene to strip it.

IMG_1650.jpg

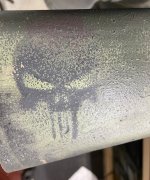
The stock was harder than I expected after it came off of the metal so well. Found the Punisher under it.

IMG_1648.jpg

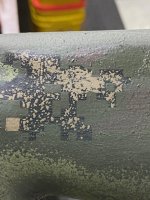
It looks like it had a digital patern on it under that paint and some of that is coming off as well.IMG_1649.jpg

got the butt done and the fumes and skin exposure was getting to me. Decided to call it a day. Next trip we will have more ventilation and some rubber gloves.

as always my day project turns into weeks :huh:
 
Last edited:

Yotedawg

Senior Member
First up was this

View attachment 1230817

I'm not sure if everyone remembers the paint scheme that was on that .308LTR I picked up

View attachment 1230818

I thought that I would strip it to check what was underneath :huh:
The first thing I did was remove the recoil pad so nothing would happen to it.
Top screw came out fine but I couldn't get the bottom out...it seemed loose but the pad wouldn't pull away. I decided to take it to my buddy's yesterday to help me figure out sup.

We finally decided the bottom screw was stripped in the stock. We decided to use a double ended blade from a utility knife to gently tap between the pad backing plate and the stock. We got it in both ends but it was still being difficult. We could see the sides came loose but the ends were still attached. We kept at it and it came off.

It appeared it had been glued on with what looked like Super Glue. So naturally it damage the stock as well as the backing plate for the pad. Sorry I didn't think to snap a few while we worked. We resurfaced the face of the stock and the recoil pad to remove the damaged area.

View attachment 1230821
The stock cleaned up pretty good on the table top belt sander except for those few pits and I think that I think will be fine. The recoil pad didn't clean up as well and cracked in a few spots.
View attachment 1230822

I am going to use this to attempt to repair the pad and fill the voids. I'll put some release agent on some tin so it come off easy and try to reshape it when the epoxy dries

View attachment 1230823

If not I will replace it. I am going to dowel the bottom hole with a maple golf tee and wait for the glue to dry, pilot drill it, thread it and then put a couple drops of thin super glue in the threads (helicoil if you will) and that should make the repair pretty hard and we should be back in bidnees

Making me a Burrito Bowl and slicing some avocado for lunch then getting back after it.
Never used that but have used jb weld quickset. Drill the stripped holes oversize and fill with jb weld. After it sets, drill the epoxy for new screws.
 

Jester896

Senior Clown
Never used that but have used jb weld quickset. Drill the stripped holes oversize and fill with jb weld. After it sets, drill the epoxy for new screws.
the reasons that product was chosen were

it was black
it has adhesion properties and it can be used as a filler to fill the broken away areas of the pads backing plate
had a 3700 psi strength

I doubt that any pressure would exceed 3700 psi on a recoil pad.
I thought about filling the hole with it and just putting the screw in the hole after dipping it in release agent and screwing the screw out at the set time. I may just fill it and drill it like you suggested...it should be strong enough to hold a screw
 

Yotedawg

Senior Member
Keep us updated. I am open to using products I have never used before. The old diesel tech in me wants the mechanical lock. Our old habits are hard to break sometimes.
 

Jester896

Senior Clown
parts have been arriving all week.

The In-line Fab stuff came today.

I need to get back on getting the paint off... @weagle has thrown a wrench in my finish plans...now I have to wait on black lava since there is none in town I can find. Brownell's does have black and OD Aluma-Hyde in stock but are out of clear now..:huh:

I did uncover a couple more things...I thought the lug was bedded but it was the whole action and lug. Not sure why you would put that much paint over your bedding and possibly change it.

PG is making me a bachelor for the weekend...links Saturday morning... then back to work in the shop. I'll get the rest of the paint off, mount the new flush mount quick change base and spacer then mount the T-7 to it's new QC base
 

Jester896

Senior Clown
@Railroader I did find matte clear Aluma-Hyde on Amazon along with the black lava and another forest green and OD and matte black at Brownell's. Michael's, Hobby Lobby, Lowe's, Home Depot and WalMart all show they can send it to me in any color but none of that wasn't in stock locally.
 

Big7

The Oracle
Use a bit of that same epoxy in the damaged threads. It's way better than super glue. Super glue is NOT what you want to fix a thread.

Break down and get you a LimbSaver recoil pad while you got it apart. If they don't list one by brand and model, you can send it to them to match it up with the screw holes. If that don't work, they make a few different sizes you can drill and the belt sander is ideal to shape it to fit. Just trace around the stock and carefully grind to the line. LimbSaver makes the best recoil pads on the market.

That was what jumped out at me. Now I'm going back and reading the entire thread.
 

Big7

The Oracle
Never used that but have used jb weld quickset. Drill the stripped holes oversize and fill with jb weld. After it sets, drill the epoxy for new screws.
Not necessary. Just put some in the hole and run the screw down. It will fill in all the voids and you don't have to drill.

I have never used quick set. I need time to work.
I use this. It comes in different size packages.

PS.. It is also very good to bed an action with.
Use a heavy spray coating of regular silicon spray for release agent.
16862321893409098046219685507499.jpg
 

Jester896

Senior Clown
knocked off early today to head to my shop and anchor my new In;ine items and work on paint removal.

A/C is out again and it was 81* in there...got the new one on the floor in the garage. Guess the rifle might have to wait a minute.

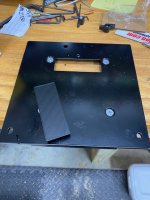
I did get the bench marked for drilling, evened up the slight angle we got in the stock, got release agent painted on the tin to hopefully repair the recoil pad and there are a few threads left in the bottom screw hole so I think I will let it ride and see.

Maybe I can get in there early one morning this weekend since I'm going to swat golfs in the am.
 

Big7

The Oracle
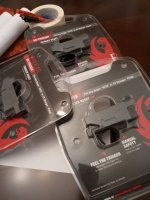
Got to check my bait traps in the morning and then I got to install 3 Ruger BX Triggers and 3 Pete's Pillars bolt stop pins on 2 10/22 Carbines and 1 20/22 target rifle.

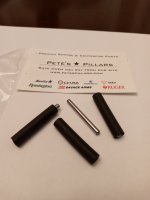
The bolt stops are stainless dowel pins in a hard(ish) neoprene sleeve.

Triggers were 100$ each and the pins were not very much but more than the solid urethane type. The 10/22's are starting to come together.

Then it's off to the range. :lovey: :biggrin2:
20230609_215621.jpg20230609_215254.jpg
 
Last edited:

Jester896

Senior Clown
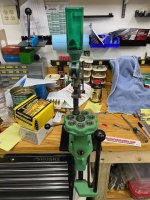
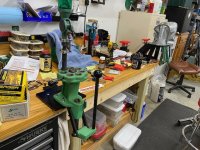
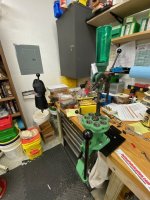
I started with this first thing...try not to notice my mess if you can.

IMG_1654.jpg
Got the Quick Change system mounted...the part on top is to seal the hole when not in use.

Got th T-7 Mounted to the Q/C plate. Man that T-7 thing needs cleaning and lubing.

IMG_1655.jpg

IMG_1656.jpg
IMG_1657.jpg

Then I started on the rifle before it got too hot in there
The release agent seems like it is going to work well. I just wish that I had put it all over it instead of just where I though the pad would be.

IMG_1659.jpg

I am going to have to redo this end since it stuck to the tin not the pad.

IMG_1660.jpg

I used this to repair the stock screw hole too. Since it was still threaded in the bottom I thought it would be OK. Put a little in the hole, screwed the screw in then packed it more at the top with a toothpick. Let it sit until it was pretty solid, then screwed out the screw and cut the excess off of the stock. Went back a little later and ran the screw in with my finger to make sure...think it is GTG.

Got the rest of the paint I'm going to get off...looks like the original color was OD so just going to coat the other green over it, web it then Aluma-Hyde the clear over it so it will not react to bore cleaner as easily.
 
Last edited:

weagle

Senior Member
Paint arrived today. That can of webbing is a little thang. @weagle how much of that can did you use on your stock?
Not very much. I highly suggest getting a big piece of plywood or or cardboard to practice your sweep when spraying. The speed and distance determine what pattern you get. I think I probably did 3 fairly fast sweeps at about 12 inches away. Every nozzle is probably a little different, so a few test sweeps will help show you what pattern you are getting.
 

rosewood

Senior Member
Got to check my bait traps in the morning and then I got to install 3 Ruger BX Triggers and 3 Pete's Pillars bolt stop pins on 2 10/22 Carbines and 1 20/22 target rifle.

The bolt stops are stainless dowel pins in a hard(ish) neoprene sleeve.

Triggers were 100$ each and the pins were not very much but more than the solid urethane type. The 10/22's are starting to come together.

Then it's off to the range. :lovey: :biggrin2:
View attachment 1232013View attachment 1232014
I bought some type of delrin/nylon? rod from Grainger and cut them the proper length for my 10/22. Cost me less than $2 for like a 3' rod. Made a few extras and gave some away. Way cheaper than the ones sold online.

Rosewood
 

Jester896

Senior Clown
Not very much.
Thanks for the tip! I saw the amount on yours and was contemplating using more for the amount of texture I wanted. Looking at the small can I wasn't sure if I wanted to order another one before I started to make sure I got the coverage I wanted. Does it lay down a good bit or is it rough?
 

Big7

The Oracle
I bought some type of delrin/nylon? rod from Grainger and cut them the proper length for my 10/22. Cost me less than $2 for like a 3' rod. Made a few extras and gave some away. Way cheaper than the ones sold online.

Rosewood
That works but the Samtoprene w/stainless core wasn't very much and they shipped free.
Hopefully these 3 will last a long time. Super quiet. You can't here the bolt hit at all when cycling. Might put a solvent strainer on the target rifle.

Before I retired, I had an almost infinite supply of plastic and rubber rod in all sizes. If I only knew back then?

Thanks for the tip.
 

Latest posts

Top